Occasionally I'll get the urge to repaint. Often it's an entire room, which is actually a large task, but this time it was just a desk. The desk in our office nook was a hand-me-down from my parents. It used to have a large hutch on top, but I removed it because it was much too large + it was just unused space. It used to be a dark walnut brown, but I painted it black a year or two ago to better match the decor in the room in which it's located {which you can see below}.
I never disliked the black desk, it was just that here recently I've had the inkling to lighten up this room. I've mentioned before about how it doesn't get very good light, so anything I can do to lighten the space is always a plus. Within the past 6 months, I painted our main hallway + an ottoman the color Dove White by Benjamin Moore. It's a slightly off-white color. I had about a quarter {or less} of a gallon of paint leftover and yesterday sealed it's fate. It was a beautiful day, my hubby was home most of the afternoon, so I had a chance to get this desk painted. I decided to distress it slightly too. So, without further ado, here's my HOW-TO on painting + distressing a desk {or table}. Each step has a picture with the description below it.
F I R S T,
The materials used for this project were pretty cost effective.I was able to complete this project for around $6 because I already had most of the materials seen in the picture with the exception of the spray paint + the paint brush. My husband always has latex gloves on hand because of his profession + he even "borrowed" a couple of face masks that we keep at home for instances such as this, or for sickness. Ha.
Materials: Satin spray paint in the color Heirloom White, a paintbrush {I would use a 1-2 inch angled brush instead of a 3 inch like is shown here}, latex gloves, a mask {optional}, a foam roller, sand paper {I believe is was 150 grit}, and about a quart of paint.
S E C O N D ,
Prepare your work space by laying out a drop cloth {this plastic one is sold at Lowe's for llike $1.50 or so}. Make sure you are working in a well ventilated area. I did this in the garage with the door open. Let me preface this entire next part by saying that in order to do a distressed look, your piece of furniture MUST have a dark color as the base. So, if you're going dark to light it should work just fine, but if you going light to a different light color, you will need to add a dark color first before adding another light color on top. I hope that makes sense.
Run that sand paper over your desk to rough it up a bit. This isn't absolutely necessary, but I had some already peeling paint + rough spots on the tabletop, so I wanted to smooth it out before painting. There's really no rhyme or reason to sanding, at least not in my opinion, so just go for it.
T H I R D,
F O U R T H,
Use the foam roller to paint the entire desk {yes, even the legs and sides}. I went in the corners and crevices with the paintbrush at the end. I prefer a foam roller to a paint brush because I don't like the lines a paintbrush leaves behind. You could totally use a brush for the entire project if you wanted though. I followed the same idea with the roller as I did with the spray paint {back + forth along the top + sides of the desk + up and down for the legs}. I put 3 coats of paint ON TOP of the already spray painted desk. I let each coat dry for about 45 minutes in between coats. This was the final coat drying.
F I F T H,
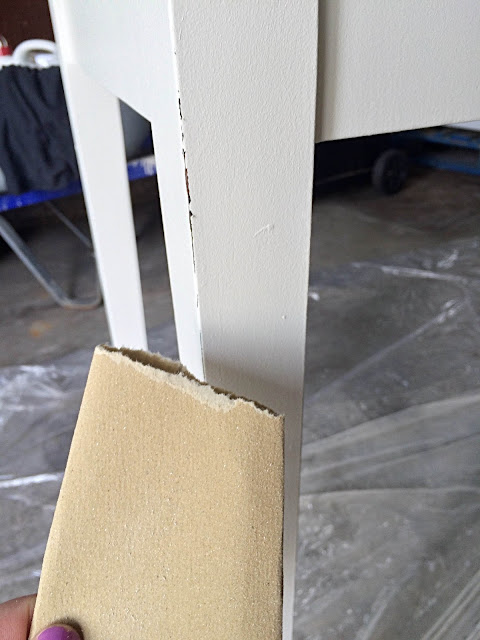
To add a distressed look to your desk, use sandpaper to rough up the edges and corners of the desk. I didn't do a TON of distressing, but just enough to make it look older + not just freshly painted. Literally, just push + pull the sandpaper removing small buts of paint in the process. Be careful not to remove TOO much, as this will make it look intentional, rather than unintentionally + natural. You can see more of the distressing in the pictures below in the SIXTH step.
S I X T H,
Allow your desk or table to dry for a good while {I waited about 4 hours, but technically you should probably allow more time than that}. I brought it back inside + waited until this morning to restyle it, allowing it extra time to dry. Don't put anything on it until it's dried for more than 12-24 hours, or else it will stick to your belongings because the paint is still somewhat tacky.
In the end, you're left with a little something like this. :) Now, go paint + distress my friends! XO!


No comments:
Post a Comment