Monday, April 11, 2016

Tackling Clutter #3: Pantry + Linen Closet

Hi again friends! I hope you've been busy decluttering your kitchens this past week after last week's post in the Tackling Clutter Series. I won't lie to you, I found myself decluttering even more as I snapped photos for that post last week. Crazy how quickly "stuff" starts hanging around, huh?

Well, the good news is I'm back this week for more insight into decluttering your home, only this time I'm tackling the pantry + the linen closet. Now, some of you may have large walk-in pantries, while others of you may not even have a pantry {and the same goes for linen closets}. Let me say this, our pantry is pretty small, but it is more than sufficient. Our linen closet is a decent size, but we only have one {many folks have multiples depending on the number of bathrooms in their home}. So, without any more delay, let's get started. I've decided to start in the kitchen with the pantry and then move into the bathroom to tackle the linen closet. Again, please remember, this is just a guide as to how WE organize these two spaces, you will most likely have to adapt for the spaces that you have, but hopefully these tips will help you to do just that.


The Pantry

The picture above shows the exterior of the pantry door {it also shows our dining space pre-dining chairs. It is painted with chalkboard paint. Below is the interior of the pantry from BEFORE I decluttered + organized it. I will say that even though it looks like a hot mess in the picture, there was SOME organization in there. Each shelf is labeled according to what it houses + I did abide by that. However, things were jammed in like sardines as this space is NOT that big. Yes, it has lots of shelves, but they aren't deep {only about 10 inches deep by 25 inches wide}.


The following pictures show you how I went from the picture above to the how it looks today {I'll include a side by side of the before and after towards the end}. The picture below is how it currently looks since the decluttering took place.


The first thing I wanted to accomplish in this space was the shelves themselves. This house was built in 1957 and this pantry uses the original shelving {though it's been painted white}. It is OLD and it shows it. I cleaned the shelves really well, then I applied this $2 shelf liner {similar to the one I used for the kitchen cabinets/drawers}. Adding the liner immediately changed the look of the inside of this space. It made it feel so much more up-to-date and clean, plus it unified it.

                                                Before                                                                           After 

Next, I took everything off of the shelves {technically I did this before I applied the shelf liner}. Yes, EVERYTHING. My kitchen was a disaster zone, which sent my anxiety through the roof, but I knew that it was for a good cause. Ha! Once everything was off the shelves, I determined which shelves would house which items. They are organized as follows now {top to bottom}: 
* Cooking ingredients {flour, sugar, baking powder, etc}, cooking oils, and breads
* Breakfast items + pasta jar {because this is the only shelf tall enough to hold it
* Pastas, rice + other similar items {bread crumbs, soup mixes, gravys, etc}
* Dressings/Sauces, canned goods, and butters {peanut butter, almond butter, coconut oil, honey}
* Drink mixes + more baking ingredients {cocoa powder, baking soda, etc}
*Adult snack foods {nuts, rice cakes, crackers} + granola {various kinds}
* Emerson's snacks {crackers, teddy grahams, vanilla wafers, etc} + a  basket of potatoes
{The remainder of Emerson-specific food, like canned fruit + pouches are housed in one of the kitchen cabinets}.

The last step was to organize the actual items into baskets according to similarities. I listed what is on each shelf above, so below I included pictures so you can see exactly how I organized it within each shelf.

Top shelf: Cooking ingredients in basket; bread + oils to the right. Tip: keep items that are used less often on a higher shelf. For me that's flour + sugar + those types of things. I don't do a lot of baking, so I hardly  need them. Don't use the lower shelves to hold these items because then you'll have to be pulling the more frequently used items from higher shelves, which is just a pain.


 Second shelf: Oatmeal, bagged cereal, nutrigrain bars, oats, + pancake mix in the basket + cereal container + pasta container to the right. Tip: Use transparent plastic or glass containers to store cereal or other items that tend to come in large boxes/containers. Not only does it free up space, but it looks much neater as well. 

Third shelf: Small pasta containers/bags, bread crumbs, flax seed + gravy mixes are in the basket, while larger boxed pastas are to the right. Tip: stack boxes or containers on top of each other with the label facing out so that you can clearly see everything {same goes for canned goods}.


Fourth shelf: dressings + pasta sauces to the far left, canned goods {by type}, and butters/honey in the basket. Tip: Use a Dynamo {or other label maker} to add labels to each shelf, so you know exactly what's on each one.


 Fifth Shelf: drink packets of any kind are in the basket on the left {tea + mostly belonging to my husband} + baking items {more frequently used} are in the smaller basket to the right. Tip: store boxes of any size with the portion that opens right side up, so that you aren't having to search for the opening.


Sixth Shelf: Adult snack foods: nuts, seeds, crackers + rice cakes in the basket to the left + granola in the smaller basket to the right {tortilla chips in the middle}.

Seventh Shelf {bottom}: Emerson's snack foods: Crackers/cookies/pretzels in the container to the left + the other random basket holds our potatoes. As mentioned above the remainder of Emerson's snacks are housed in a kitchen cabinet. Tip: Use plastic juice containers to hold snack foods, like pretzel sticks or goldfish. You can label it + see it clearly, plus the kiddos have a harder time getting into it if it has a screw on lid as opposed to a folded bag top or something of that nature.


If you're wondering where I got the black and white baskets, the answer is Dollar Tree. They were actually used in my classroom, so I have TONS of them in the attic. They are a cheap alternative to wicker or wire, although those are prettier, if I'm being honest. Because these are mostly hidden inside the pantry though, I don't really care about "pretty", just so long as they coordinate color-wise, I'm good. And as promised, here's a before and after of the pantry. 
                                  Before                                                                                           After
          

The Linen Closet


I am QUICKLY going to give you a run down on how I organized our linen closet. I used to have an entire blog post about it, but when I switched hosts, obviously it got deleted. *womp womp* Anyway, to keep it quick and simple, I'm going to post just a few pictures and provide a brief explanation above each of how I keep this space organized.

We have ONE linen closet in our main bath. It's a pretty decent size, so I'm not complaining. It is NOT cute though, so you've been warned. Maybe one day I'll paint the shelves, but honestly, probably not. Anyway, when you open the linen closet door, you see this. Yes, that's a shoe organizer and it's my first tip. Tip: Add a shoe organizer to the inside of the door + use it to store all of those miscellaneous items that manage to sneak their way all over the bathroom making them tough to find in times of need. I got this one at Goodwill for like $2, but in general, I don't think they're that pricey.

In this organizer, I keep everything from sunscreen, to facial cleansing wipes, to fingernail polish remover, to hydrogen peroxide, to cleaning solutions {way up top}, to air freshener, to extra supplies {deodorant, toothbrushes, face wash, soap, etc}. I also have an Ipsy subscription, and ladies if you have one you know, SO MANY mini bottles of things. I love everything I get, but I was running out of space to keep it all. Now, I have ONE pocket that houses all of it- you can see them all right there next to the Q-tips. I have each little pocket organized according to the type of product {air freshers together, shampoos/conditioners together, sunscreen together, etc}. Tip: Keep anything dangerous for little hands towards the top + out of reach. Typically I have found that these pockets are large enough to hold a standard size spray bottle of cleaning solution, so that's a great way to store them even if it's in another closet in your house.


Each shelf is labeled {similar to the pantry} according to what it houses. 

On the floor of the linen closet we keep our extra paper towels {what won't fit under the kitchen sink because we buy in bulk} + toilet paper, along with Emerson's little potty.

The bottom shelf houses 2 baskets; one holds ALL of my hair products, including styling items like my flat iron + curling irons. I left space in between the two baskets to store those while they're cooling, so they don't burn my baskets or start a house fire {my husband would kill me being that he's a fireman and all}. The other basket houses all of my "smell good stuff", as I call it. Basically, all of my plug-in refills.
Guys, this is my basket of hair supplies. NOT organized-see, even I'm guilty of breaking my own rules. At least you can't see it because it's all in this pretty little basket. ;)
The next shelf holds beach towels, adult washcloths + hand towels {in the center basket} + kid-sized washcloths in the basket to the far right. Tip: Organize adult + kid items separately to eliminate a large stockpile. Also, don't keep those washcloths that are bleached or discolored unless it's all you have. Keep matching towels together, if possible, for a unified look {especially when guest come}. This brown one snuck in there. Whoops!


The next shelf holds towels only. They are folded and stacked according to color. Tan, brown, blue, and white- those were our colors in our first apartment, so...yeah. Tip: fold towels and keep them stacked neatly to keep your shelves uncluttered and organized.

The next shelf holds all of our sheets and pillow cases. Emerson's are housed on the left + ours are on the right.  Tip: Use a pillow case to contain ALL the other pillow cases in one spot; that way when you need one, you aren't searching through sheet sets to find one.


Not pictured is the very top shelf, which houses a fire extinguisher, bathroom cleaning supplies {drain cleaner, bleach, etc}, and extra pillows. Also, ideally using matching baskets or bins helps to unify the space, but because I already had these baskets available, I just used what I had to save money.

I hope you've found this helpful! I feel so much better now knowing that our pantry is nice and neat. I won't have to move a bunch of stuff around to find what I need anymore! Woo hoo! Now, it's your turn! Go organize, people! GO! Come back next week for another post in the series that will focus on organizing your desk space! Phew, I'm tired just thinking about that one, but here's a little preview. XO!





Wednesday, April 6, 2016

Recover a Chair in Under 2 Minutes

The title of this post is a LITTLE deceiving, but only because you won't be able to recover an entire chair in under two minutes, unless of course it's a dining chair with just a seat cushion. If that's the case, then it CAN be done and I'm going to show you how. Not only am I going to show you how you can do it super quickly, {I even included a video to prove it}, but also how you can do it for super cheap too! It's a win-win for everyone!

Let's begin with my Goodwill haul from today. I go to the thrift store about once a week, just to cruise for items on my "want/need" list. I've been WANTING new pillows for outside, some old bottles, and some shorts/pants for Emerson {because she's growing like a weed} + some spring/summer dresses for her and I. I've been NEEDING fabric to recover 2 dining chairs that have been out in the garage for a while, and a queen size bedskirt for our bed. Currently, I have curtain remnants of painters drop cloths pinned to the mattress {I know, please continue rolling your eyes because I am too}.Today I found ALL of these things for less than $20 total! The pillows are indoor pillows currently, but I am going to spray them with waterproof fabric spray so that they can hang out outside {on the covered porch}. The bedskirt has a linen feel to it + is super airy. I'm going to put that on the bed as soon as I finish up here. The fabric that I found for the chairs is at the bottom of this picture. I believe it's actually a tablecloth because it's quite large + thick {it feels like upholstery fabric, but is trimmed like a tablecloth}. Anyway, the fabric was originally $4.99, but because the color of the day at Goodwill today was GREEN and the tag on the fabric was green, I got it half price, so ~$2.50! Now, on to the chair recovery process.


I have a few pictures/fabric shopping tips that I'll share after this short video. I told you this whole process can be completed in under two minutes. I figured you wouldn't believe me, so I'm just going to prove it! P.S. I created a YouTube account, so that I can start posting videos within my blog for easier access. Be sure to subscribe and tell me what you think and if you found this helpful!  My YouTube Channel is listed as A Little Thrifty Chic. Click the video below {or the username to the left} to view! Also, my hair looks like a complete HOT MESS in the video, please don't judge.


STEP ONE: Begin with your seat cushion positioned centrally on the pre-cut piece of fabric {measurements don't need to be precise unless you have just the right amount of fabric,  otherwise just eyeball it so that you'll have enough fabric to wrap around each side}. 

 STEP TWO: Fold two opposite sides, one at a time. Pull each tightly and staple 5-10 staples firmly into the wood under the cushion.  {I just went right on top of the existing fabric, but you could definitely remove any other fabric that's already on the cushion first if you wanted}.

STEP THREE: Fold the other two sides like you would a present {at the ends}. It should form 2 triangles. From there, you'll fold the entire end {both triangles together} over the cushion and staple it to the wood. Don't be shy with the staples here and really apply pressure since there's more fabric here from where we folded the fabric on top of itself. Follow the sequence of pictures below.


Before stapling, carefully inspect the corners where you folded it like a present. If it is bunched up oddly or just doesn't look right, undo + try again. It should be pretty seamless, as this is the portion of the cushion that will be visible {the underside doesn't matter obviously}. 


STEP FOUR {final step}: Turn the cushion right side up, and reassemble it onto the chair. Step back and admire your super easy + super quick chair transformation! This particular chair was $2.50 {but I have 2, so make it $5}, the spray paint was $3 and the fabric was $2.50, so the total cost to redo both chairs was just about $11. NOT TOO SHABBY! I'll post pictures on Instagram tomorrow of the chairs in their new home.


I'm telling y'all, this is SO easy! If you don't own a staple gun, go to Lowe's and buy you one! You won't regret it; it's been my most useful tool! Also, really quickly, when searching for fabric, I highly recommend browsing the linens section at the thrift store {or a couple thrift stores}. Just wash it first and it's good as new! Don't limit yourself to the fabric store. You can use tablecloths, shower curtains, blankets, curtains, sheets, etc. The opportunities are endless and SO MUCH CHEAPER than buying fabric, usually. Like I said earlier, this fabric seen here was a tablecloth and I have enough left over to recover my ottomans, should I choose to go that route. Be thrifty and creative when searching for fabric. Think outside the box! :) Hope you've found this helpful. Come back Saturday for some simple tips on decorating your front porch for the warmer weather and on a budget, at that! XO!

Monday, April 4, 2016

Tackling Clutter # 2: Kitchen Cabinets + Drawers

It's time for another post in the series "Tackling Clutter", as you probably already determined from the title. I'm so excited this is a popular topic that y'all enjoy because I love sharing it with you. Today, I'm going to provide some tips on how to declutter your kitchen cabinets, drawers, and countertops. I'm not quite sure how or why, but cabinets, drawers + countertops can get so cluttered so quickly. How does it happen? I've decided it's probably due to the fact that it's mostly hidden storage, so you shove stuff in those bad boys + shut the door faster than a toddler can make a mess {which if you have kids, you know is DANG FAST}. You know those 50+ cups you have, or those 85 mismatched pieces of silverware? How about the pots with no matching lid, or the tupperware that manages to multiply over night? What are they mating behind those doors or something? How about the piles of paperwork or the 18 kitchen appliances on your counters. Yeah, we're going to tackle that today because nobody needs 50 cups, or 35 different tupperware containers. And certainly you don't need piles of mail + unused appliances crowding your precious counter space! So, let's jump right in, shall we?

We have a galley style kitchen {the cabinets line both walls}. This type of kitchen is typical in older homes. We have a decent amount of cabinet space, but nothing extraordinary. We have 8 upper cabinets and 7 lower cabinets, and 5 kitchen drawers {6 including the one on the island}. I'm going to start with the upper cabinets, then move to the lowers, and finish up with the drawers. I am including labeled pictures as we go because if you're anything like me, you're a visual learner. The following tips are just a guideline since everyone has a different kitchen size + layout. To begin, here's a picture of our kitchen for a visual.


Tip 1: if your cabinets are old like ours {1957 baby!}, add a liner to the shelves. I used this self-adhesive black and white liner from Big Lots for $2 a roll {Dollar Tree also carries shelf liner}. I measured the cabinet shelves {most were about the same size} + cut the liner to size for each. This was semi-time consuming, but very well worth it.
Without Shelf Liner
With Shelf Liner


The upper cabinets to the left of the sink house ceramic + plastic bowls that we use daily, and it contains our everyday use plates {including Emerson's little plates}. The top shelf holds a drying rack for sippy cups. Tip 2: Arrange everyday use items in the same cabinet. Plates + bowls should be located near the silverware drawer for easy access to all necessary items. 


The upper cabinets to the right of the sink house tupperware stacked by size + style on the top/middle shelves, and the bottom shelf houses tumblers + larger plastic water bottles. Tip 3:ONLY KEEP WHAT YOU USE both for tupperware + tumblers! Anything that's hanging out in there simply because you think it's "cute" or it "might get used one day", get rid of it. There is nothing worse in the kitchen than having stuff fall out of your cabinets when you open them {this used to be tupperware for us}; maybe you can relate.


The shelves surrounding the sink are home to our drinking glasses + simple decor items.


Moving to the other side of the kitchen, from far left to right. The small cabinets above the fridge hold serving platters + casserole dishes. I don't use these very often at all, so I keep them out out of the way. Tip 4: Try to placed seasonal or only used on occasion items in the hard to reach cabinets, so they don't take up valuable, daily cabinet space. I did not take pictures of this space.

The cabinets directly above the coffee tray house coffee tins on the top shelf {we have several different kinds of coffee}, Emerson's sippy cups + snack cups on the middle shelf along with our few extra drinking glasses +mason jars, and on the bottom shelf are all of our coffee mugs + vitamins {plus my 21 Day Fix containers + info}. Tips 5 + 6: Keep coffee mugs beside the coffee pot or at least very close by. This is helpful for guests and/or for those tired mornings. ;) Also, only keep mugs that get used regularly. Coffee mugs are so popular with lots of people, but don't be a hoarder. Keeping them stock piled in a cabinet doesn't do anything for anyone. So, if it's not getting used, donate it.


The small cabinet directly above the stove houses all of our spices. This is an atypical feature, since most newer houses have a pretty hood vent. Tip 7:  If you don't have a spice cabinet, use a spice rack or a magnetic strip to contain spice jars to one small area. Otherwise, try to keep your spices out of sight, as they can make a kitchen appear cluttered.


The far right cabinets house nice dinnerware + glass mixing bowls on the top, while the bottom shelf holds plastic mixing bowls and our knife block. Tip 8: If you have children, try to keep your knives stored either in an upper cabinet or out of reach/out of sight. 


You still with me?

The lower cabinet to the left of the sink houses our electronic kitchen appliances, like the toaster, toaster oven and crockpot. We don't use the toaster everyday, so it stays stored away and we just pull it out when needed. It is stored near an outlet though. Tip 8: Keeping electronics "hidden" until needed prevents your counters from looking overcrowded, plus it provides you with much more counter space. These items are one of the main ways counters look/feel cluttered + chances are you aren't using them all nearly as frequently as you think.


The cabinets under the sink store our blender and our Kitchen Aid mixer on the left, and paper products + daily used cleaning supplies on the right. I keep 2 cleaning sprays, sponges/brushes, dishwasher detergent + dish/hand detergent underneath the sink. All other cleaning supplies are stored on a shelving unit in our front hall closet. I did this intentionally to keep them out of reach from little hands. I never have to worry about her getting into cleaning supplies because she can't reach them and/or she doesn't try to get to them. If you have more curious children in this department, I suggest keeping cleaning supplies stored up high. 


Tip 9: Do not clutter your sink with brushes and sponges and dish soaps. I just repurposed a hand soap dispenser and I keep dish soap with hand renewal in it. It doubles as hand + dish soap. I also keep a plastic sponge holder in the sink, so that the sponges/rags aren't draped all over the sink. This keeps the sink area tidy and organized.


The lower cabinets closest to the fridge hold a tupperware container filled with my breast pump, bottles, and other baby items not currently in use. It also holds some of Emerson's snack foods + large pots that are rarely used. 

The lower cabinets to the right of the stove hold pots and pans {stacked by size + style} and their matching lids are housed on a desk organizer in the same cabinet {like the one seen below}. Tip 10: Keep pots and pans in lower cabinets because kids love them. Also, keep lids organized rather than keeping them on the pot they belong too. You can't put many pots + pans together if you leave the lids on, thus taking up far more cabinet space than is necessary.

The lids fit perfectly in between the gaps in this metal file folder holder.

Really quickly, because this is turning into a novel. I used a different liner for the drawers {purchased at Dollar Tree}. The silverware drawer is to the left of the sink. Again, it's in close proximity to our daily used plates + bowls. I use a silverware organizer to sort it all. I also keep measuring spoons + a dish drying mat in this drawer {because it's next to the sink}.


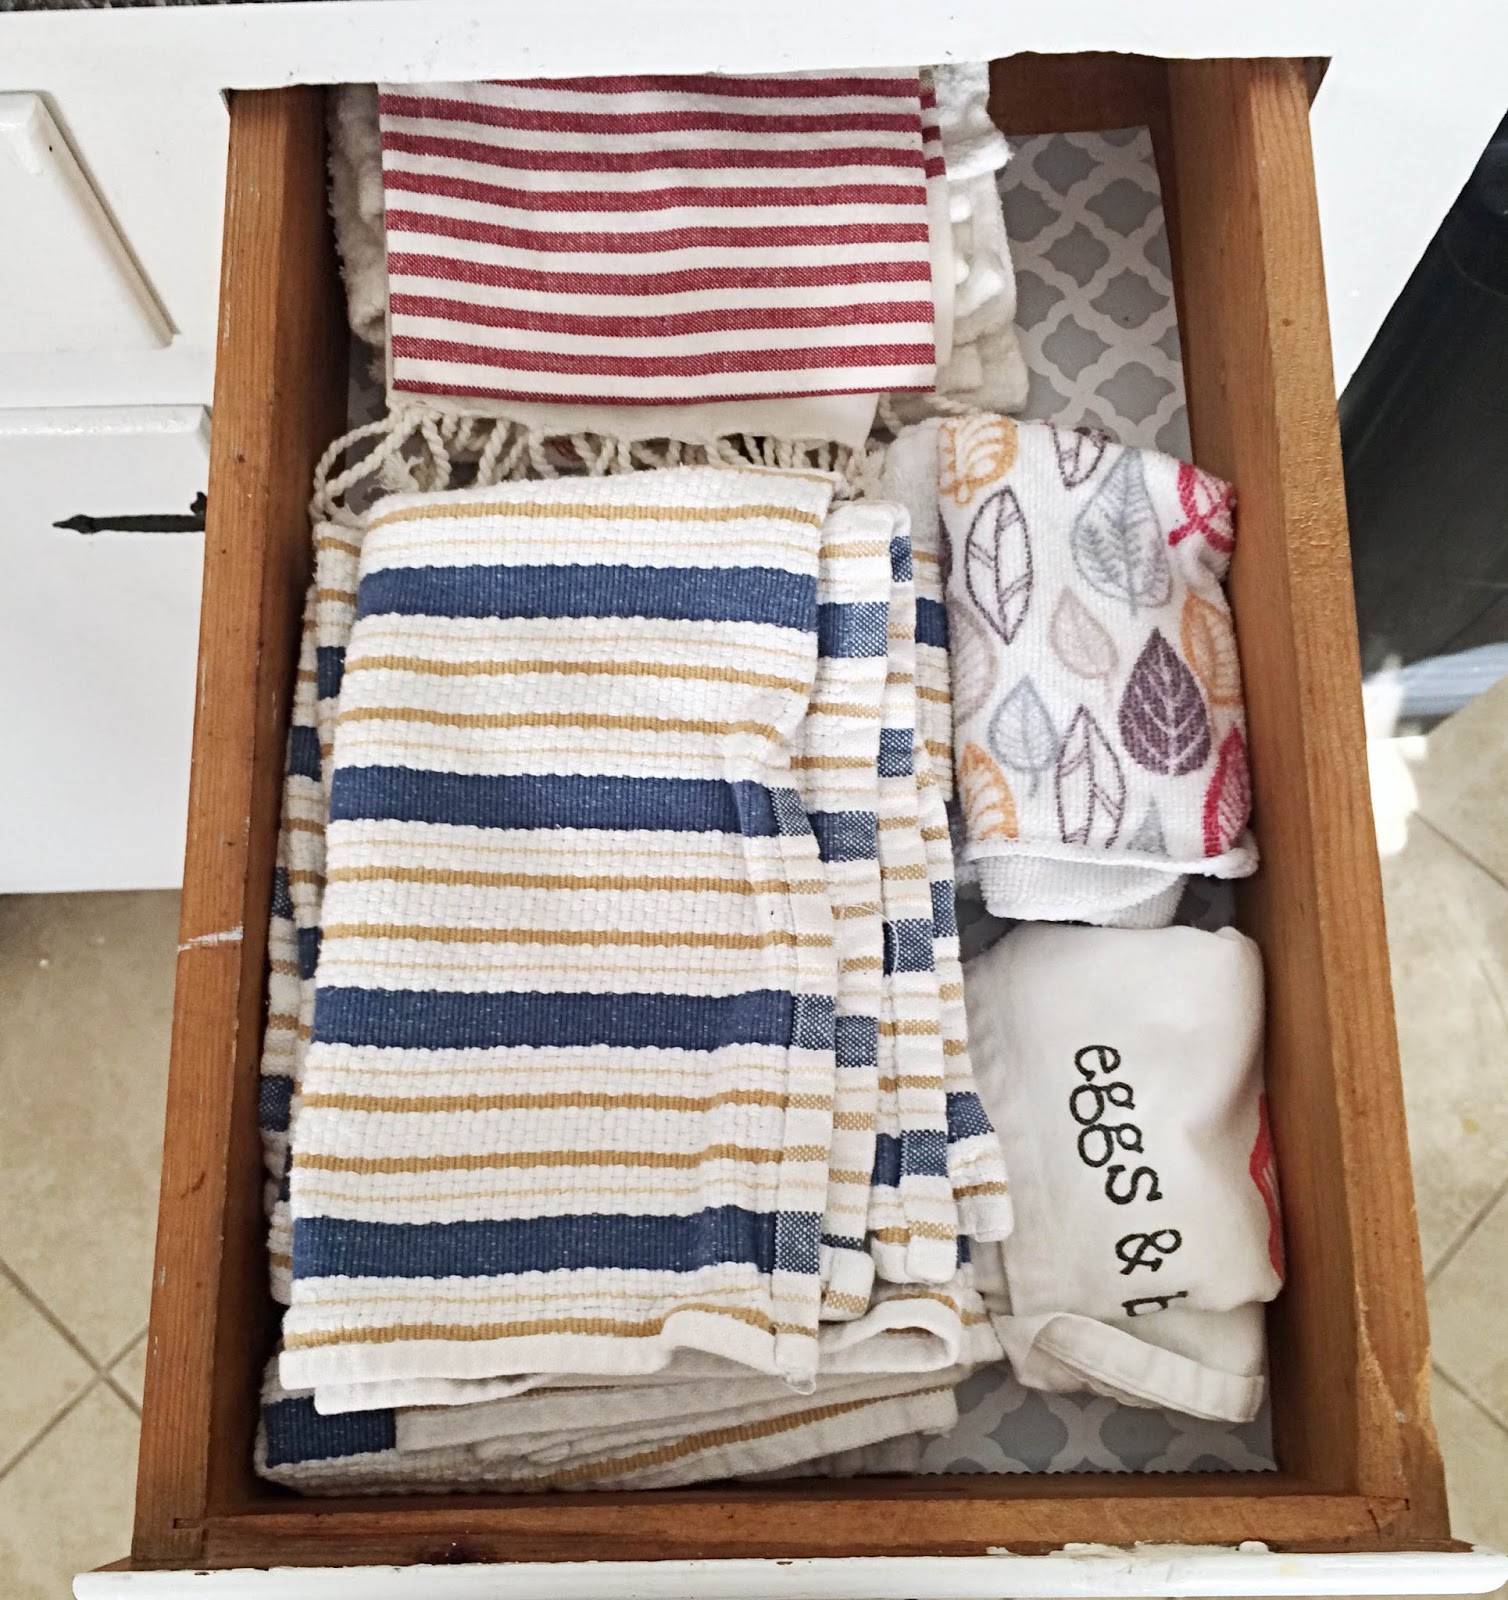
The drawers on the opposite side of the kitchen are organized as follows from left to right. "Junk drawer" {which actually doesn't house a ton of junk, but mostly useful random items}, Cooking utensils organized using another silverware organizer, plastic sandwich/snack bags + aluminum foil/parchment paper, and finally kitchen towels/rags.

Reuse old pill bottles to hold smaller supplies, like paperclips, safety pins, etc.


Tip 11 is to keep your drawers and cabinets organized according to usage. Keep like-minded items grouped together for easy storage and location. Basically, you don't want your cooking utensils opposite of the stove because that's mostly where they get used. You don't want your coffee mugs far away from your coffee station and so forth. As far as drawers go, keep them simple + don't be afraid to use little containers inside your drawers. They're great for keeping things separate + neatly organized. Don't overcrowd them. If something isn't used often, GET RID OF IT! I can't preach that enough. 


My final tip is in regards to countertops. The less you have to keep on the counter the better. Countertops are another cluttered area that people don't even consider. Cleaning off your countertops can do wonders for making your kitchen appear larger + cleaner {even if it's not really all that clean}. Only keep the necessities on the counter {for us that's the coffee pot, the spatulas, the microwave {because we don't have one above the stove}, a candle, and the fruit bowl. Literally, that's it! Everything else that we could possibly need is purposefully and thoughtfully stored in our cabinets. It's never been an issue to keep most things in the cabinets instead of on the counters. It gives me more room to cook + it is FAR more appealing to walk into a kitchen with cleared countertops than cluttered ones. So, my FINAL TIP {#12} is to keep your countertops cleared off + only display the necessities!

I hope this has been helpful and if you are still reading, hats off to you. Go rest your eyeballs now. :) Join me next Monday for another post in this series all about organizing your pantry + linen closet! XO!


Saturday, April 2, 2016

A Special Post: The Blogging Life

Happy Saturday Sweet Friends! This post was originally going to be about something totally different related to Emerson + motherhood, but I'm saving that for another special post coming soon. I will warn you that this one is somewhat lengthy, so my apologies, but I promise it's worth the read. I told y'all I had a 'special post' for today and I was being dead serious. So serious in fact, that I obviously titled this post using those exact words.

I am honored to be a part of the blogging community. This community is quite large + full of variety. When I first started blogging to a more specific audience about 2 months ago, I never imagined it would explode like it has. Now, I'm no big name blog or anything like that, and there are millions of bloggers with FAR more followers than me, but that's not why I'm in it. I have told you before that I blog because I love writing + being honest about struggles + joys. I love helping and encouraging people to make their houses into homes on a very friendly budget. I enjoy helping people declutter and organize, and you know what's so crazy to me still, people read my blog and follow ME because they care about what I have to say. That is so humbling and I am so blessed by you guys. This has been the biggest encouragement for me since becoming a mother. I really feel like I'm where I'm supposed to be.

People, including my own husband, don't understand the effort and work that goes into blogging. Sure, it looks easy from the outside; all we're doing is posting lots of pictures and essentially writing a short essay, right? WRONG! My friend Shirri over at Stringfellow + Co Blog recently wrote a post titled "10 Things Non Bloggers Need to Know About Bloggers". It was SPOT ON and it would mean a lot not only to her, but to me if you would click that link back there + read over her post real quick. It will give you a better understanding of life behind the blog. Also, if you're a blogger you'll be saying "preach girl, preach" the entire time you read. I want my intentions to be clear and I want those of you who only see the "tons of posts" that I do on IG + my Alittlethriftychic FB page to see the 'behind the scenes". This endeavor, though still just a serious hobby, requires MUCH more time and effort than I'd originally planned. I am NOT complaining in the least because I absolutely love doing this! I can honestly say that this brings me more joy than teaching ever did.  Wow, I've never said that out loud. I love connecting with people and encouraging people. I love helping them find ideas and solutions that will work for their homes, while also encouraging and relating to others about the struggles and joys that I face as a mother, a wife, and a woman. I know that I am supported greatly because I have built a "tribe" that has my back and understands what it's like. Y'all have taken me from 300 followers to 1400+ followers on IG in 2 very short months {and I say that in shock not as a bragging statement}. I literally still don't know how it happened!! I am humbled daily by the kind comments, the encouraging words, and the sweet messages both from those I now consider friends and those of you that are complete strangers still. I really feel like I'm where I'm meant to be, both at home with my baby girl and pursuing something that I absolutely love with the hopes of one day making it into more. So, from the bottom of my heart, THANK YOU to each of you who read these posts, like or comment on my pictures, or even those of you that pray for me. It honestly means the world to me.
As if I haven't been honored enough just to be part of this community of ultra talented {mostly} women, I had the joy of being nominated for the Lobster Award recently. What the heck is that, you ask? Don't feel bad, I had no clue it even existed until a fellow blogger-friend, Katie nominated me for the award. Katie and I have collaborated on a project on Instagram recently, and she's so sweet and stylish. She's also a mama and follower of Christ, which makes her even more special. Basically, the Liebster award is an award given from one blogger to another. It's an awesome way to recognize up and coming smaller blogs. The way it works is that I post 5 facts about myself, and answer the 5 questions that Katie posed to me {see below}. Then, I nominate 5 other bloggers and give them 5 questions to answer. The purpose, again is to recognize those that work so hard to really make something of themselves and their blog in this big ole blogging world. Thank you SO, SO, SO much Katie for not only nominating me, but for supporting and encouraging me along the way. You are a gem. So, without further ado, here are 5 facts about me + my answers to Katie's questions.

F I V E  F A C T S about M E:

1} I have lived in the same city all of my life + have always been within 5 minutes of my parents. I love this because I'm VERY family-oriented.
2} I love fashion and make-up, but rarely know what I'm doing when it comes to either. I get lots of inspiration online thankfully. I would live in leggings and a graphic tee if I could.
3} I struggle with anxiety and I am constantly reminded of how much I need the saving grace of the  Father. Cleaning and organizing help me stay sane; it's usually also how you can tell I'm anxious about something.
4} I am an introverted extrovert. WHAT?! I am the ultimate homebody, which is why I love decorating our house so much. I am perfectly content staying home + time at home {alone} is where I recharge my batteries. BUT, I also like meeting and being around other people, especially if they can make me laugh. I strongly dislike small talk, though.
5} I still have the same best friends that I had in middle school. We all have kids + husbands now, but we group text on the regular + try to get together once a year. I love them VERY much, more than they probably know. Their support in this means so much to me.

K A T I E ' S  Q U E S T I O N S  to M E:
1} What is your guilty pleasure as a parent?
My guilty pleasure is watching reality television while Emerson naps. I obviously don't do it everyday, but usually about twice a week I catch up on all of my shows while she naps. It's ME time and I love it. I'm not going to lie to y'all, I really look forward to nap time everyday. I can't be the only one...

2} What does your "mom uniform" consist of?
Ha, I kind of already answered this above. I wear black leggings and long graphic tees a lot with a fun necklace, a watch, and 5-6 bracelets {simple silver + gold}. I prefer leggings to jeans for comfort purposes, plus they're more forgiving when I eat a lot, but honestly I probably wear jeans more regularly in public than I do leggings. At home, I'm usually always in leggings {or pajamas-haha}.

3} How did your marriage change after becoming a parent?
Man, more like how didn't it change! I quit teaching right before Emerson was born {summer baby} and as a result, my husband picked up a second job to cover some of the financial difference. His primary job is a firefighter/paramedic working 24 hour shifts 3 days a week, with a four day break after the 3 shifts are completed. He started working as a part-time as a paramedic on the children's hospital transport team shortly after Emerson was born. We RARELY saw one another for the first 8-12 months of her life because when he was home he was usually sleeping. We lived like this until just a few months ago. Our marriage struggled a lot because of this schedule change. Not to mention I went from working full time to staying home full time + having a baby to care for 24-7. I struggled with Post-partum depression for a while and this really took a toll on us too. Finally, his schedule has started to even out and we are spending a lot more time together + are able to do more as a family,

Through having a baby, I have learned how selfish I really was before children. I have learned to take into consideration the needs of others {especially my husband} before my own. I have learned how independent I really am and how headstrong I can be. I have learned that I am NOT always the boss, even though I think I am. Trey and I have really had to learn to communicate more effectively since having Emerson. I am so grateful to him for being so supportive. He works harder than most people I know and never complains about it. He works long hours and often goes days without seeing us. It's easy for me to complain about this, but I really am grateful for his sacrifice so that I can be at home raising our daughter. :) Did I answer that question? I think I may have strayed on a tangent. Whoops!

4} Who is your favorite person to follow on Instagram?
I have a couple favorites, but if I had to choose one, I would say MaLyn @malyn.logic. I had the honor of collaborating with her recently also.  MaLyn is so relatable and she can make light of any situation. I seriously stalk her page, but in a non-creepy way. She is one of those people that really makes you feel like you are not alone in your emotions and/or your struggles. Aside from all of that, she is truly hilarious and so supportive of other women/bloggers. AND she's GIRL BOSS because she runs her own t-shirt business, has 3 young children + a husband. I admire her so, so much!

5} What is your favorite beverage?
My favorite beverage is Coke Zero or coffee. I love both so very much. I don't drink soda very much anymore though, so when I do it's a real treat. I drink a lot of water, though I wouldn't consider it a "favorite".

I am so honored to have been "awarded" this and I want to nominate 5 women who inspire me and have been an encouragement to me along the way. THANK YOU to these ladies for bringing a smile to my face on a daily basis. You deserve this award!! Don't forget to give 5 facts about yourself + answer the questions below. :) XO!
* Bree because she's my insta-bestie + my soul sister. We are so similar it's scary AND she inspires me with her beautiful home decor on a budget.
* MaLyn  {visit her business page too} because of all of the reasons I listed above. :)
* Christina because we live like 40 minutes from each other and because she's seriously one of the funniest people ever + she is full of wisdom in this big blogging world.
* Tricia {who just wrote her first book, so I'm linking that website}was the very first person I reached out to about expanding my audience on IG. She gave me some great advice + she has continued to support + encourage me and I'm very grateful to her for that. Plus, she's sweet as pie + has adorable children. Oh, and she loves living clutter-free like me! Visit her blog Clean House With Kids.
* Abbie because she's also quite funny and I love her blog series that she's about to start called "whatmomsgoogle". She holds my attention and she's supportive of me too!

M Y  Q U E S T I O N S  T O  M Y  N O M I N E E S:
1} What's been the biggest challenge you've faced in the blogging world since you started blogging?
2} What originally made you start blogging in the first place, and have you kept that passion or veered in a different direction?
3} What is the hardest part of motherhood for you? How about the easiest?
4} What do you hope to be doing in 3-5 years from now?
5} If you make money blogging, how did you go from strictly having it as a hobby to now having it as a hobby + business? What's your advice for bloggers wanting to turn it into a hobby + business venture?