Showing posts with label Declutter. Show all posts

Monday, April 4, 2016

Tackling Clutter # 2: Kitchen Cabinets + Drawers

It's time for another post in the series "Tackling Clutter", as you probably already determined from the title. I'm so excited this is a popular topic that y'all enjoy because I love sharing it with you. Today, I'm going to provide some tips on how to declutter your kitchen cabinets, drawers, and countertops. I'm not quite sure how or why, but cabinets, drawers + countertops can get so cluttered so quickly. How does it happen? I've decided it's probably due to the fact that it's mostly hidden storage, so you shove stuff in those bad boys + shut the door faster than a toddler can make a mess {which if you have kids, you know is DANG FAST}. You know those 50+ cups you have, or those 85 mismatched pieces of silverware? How about the pots with no matching lid, or the tupperware that manages to multiply over night? What are they mating behind those doors or something? How about the piles of paperwork or the 18 kitchen appliances on your counters. Yeah, we're going to tackle that today because nobody needs 50 cups, or 35 different tupperware containers. And certainly you don't need piles of mail + unused appliances crowding your precious counter space! So, let's jump right in, shall we?

We have a galley style kitchen {the cabinets line both walls}. This type of kitchen is typical in older homes. We have a decent amount of cabinet space, but nothing extraordinary. We have 8 upper cabinets and 7 lower cabinets, and 5 kitchen drawers {6 including the one on the island}. I'm going to start with the upper cabinets, then move to the lowers, and finish up with the drawers. I am including labeled pictures as we go because if you're anything like me, you're a visual learner. The following tips are just a guideline since everyone has a different kitchen size + layout. To begin, here's a picture of our kitchen for a visual.


Tip 1: if your cabinets are old like ours {1957 baby!}, add a liner to the shelves. I used this self-adhesive black and white liner from Big Lots for $2 a roll {Dollar Tree also carries shelf liner}. I measured the cabinet shelves {most were about the same size} + cut the liner to size for each. This was semi-time consuming, but very well worth it.
Without Shelf Liner
With Shelf Liner


The upper cabinets to the left of the sink house ceramic + plastic bowls that we use daily, and it contains our everyday use plates {including Emerson's little plates}. The top shelf holds a drying rack for sippy cups. Tip 2: Arrange everyday use items in the same cabinet. Plates + bowls should be located near the silverware drawer for easy access to all necessary items. 


The upper cabinets to the right of the sink house tupperware stacked by size + style on the top/middle shelves, and the bottom shelf houses tumblers + larger plastic water bottles. Tip 3:ONLY KEEP WHAT YOU USE both for tupperware + tumblers! Anything that's hanging out in there simply because you think it's "cute" or it "might get used one day", get rid of it. There is nothing worse in the kitchen than having stuff fall out of your cabinets when you open them {this used to be tupperware for us}; maybe you can relate.


The shelves surrounding the sink are home to our drinking glasses + simple decor items.


Moving to the other side of the kitchen, from far left to right. The small cabinets above the fridge hold serving platters + casserole dishes. I don't use these very often at all, so I keep them out out of the way. Tip 4: Try to placed seasonal or only used on occasion items in the hard to reach cabinets, so they don't take up valuable, daily cabinet space. I did not take pictures of this space.

The cabinets directly above the coffee tray house coffee tins on the top shelf {we have several different kinds of coffee}, Emerson's sippy cups + snack cups on the middle shelf along with our few extra drinking glasses +mason jars, and on the bottom shelf are all of our coffee mugs + vitamins {plus my 21 Day Fix containers + info}. Tips 5 + 6: Keep coffee mugs beside the coffee pot or at least very close by. This is helpful for guests and/or for those tired mornings. ;) Also, only keep mugs that get used regularly. Coffee mugs are so popular with lots of people, but don't be a hoarder. Keeping them stock piled in a cabinet doesn't do anything for anyone. So, if it's not getting used, donate it.


The small cabinet directly above the stove houses all of our spices. This is an atypical feature, since most newer houses have a pretty hood vent. Tip 7:  If you don't have a spice cabinet, use a spice rack or a magnetic strip to contain spice jars to one small area. Otherwise, try to keep your spices out of sight, as they can make a kitchen appear cluttered.


The far right cabinets house nice dinnerware + glass mixing bowls on the top, while the bottom shelf holds plastic mixing bowls and our knife block. Tip 8: If you have children, try to keep your knives stored either in an upper cabinet or out of reach/out of sight. 


You still with me?

The lower cabinet to the left of the sink houses our electronic kitchen appliances, like the toaster, toaster oven and crockpot. We don't use the toaster everyday, so it stays stored away and we just pull it out when needed. It is stored near an outlet though. Tip 8: Keeping electronics "hidden" until needed prevents your counters from looking overcrowded, plus it provides you with much more counter space. These items are one of the main ways counters look/feel cluttered + chances are you aren't using them all nearly as frequently as you think.


The cabinets under the sink store our blender and our Kitchen Aid mixer on the left, and paper products + daily used cleaning supplies on the right. I keep 2 cleaning sprays, sponges/brushes, dishwasher detergent + dish/hand detergent underneath the sink. All other cleaning supplies are stored on a shelving unit in our front hall closet. I did this intentionally to keep them out of reach from little hands. I never have to worry about her getting into cleaning supplies because she can't reach them and/or she doesn't try to get to them. If you have more curious children in this department, I suggest keeping cleaning supplies stored up high. 


Tip 9: Do not clutter your sink with brushes and sponges and dish soaps. I just repurposed a hand soap dispenser and I keep dish soap with hand renewal in it. It doubles as hand + dish soap. I also keep a plastic sponge holder in the sink, so that the sponges/rags aren't draped all over the sink. This keeps the sink area tidy and organized.


The lower cabinets closest to the fridge hold a tupperware container filled with my breast pump, bottles, and other baby items not currently in use. It also holds some of Emerson's snack foods + large pots that are rarely used. 

The lower cabinets to the right of the stove hold pots and pans {stacked by size + style} and their matching lids are housed on a desk organizer in the same cabinet {like the one seen below}. Tip 10: Keep pots and pans in lower cabinets because kids love them. Also, keep lids organized rather than keeping them on the pot they belong too. You can't put many pots + pans together if you leave the lids on, thus taking up far more cabinet space than is necessary.

The lids fit perfectly in between the gaps in this metal file folder holder.

Really quickly, because this is turning into a novel. I used a different liner for the drawers {purchased at Dollar Tree}. The silverware drawer is to the left of the sink. Again, it's in close proximity to our daily used plates + bowls. I use a silverware organizer to sort it all. I also keep measuring spoons + a dish drying mat in this drawer {because it's next to the sink}.


The drawers on the opposite side of the kitchen are organized as follows from left to right. "Junk drawer" {which actually doesn't house a ton of junk, but mostly useful random items}, Cooking utensils organized using another silverware organizer, plastic sandwich/snack bags + aluminum foil/parchment paper, and finally kitchen towels/rags.

Reuse old pill bottles to hold smaller supplies, like paperclips, safety pins, etc.


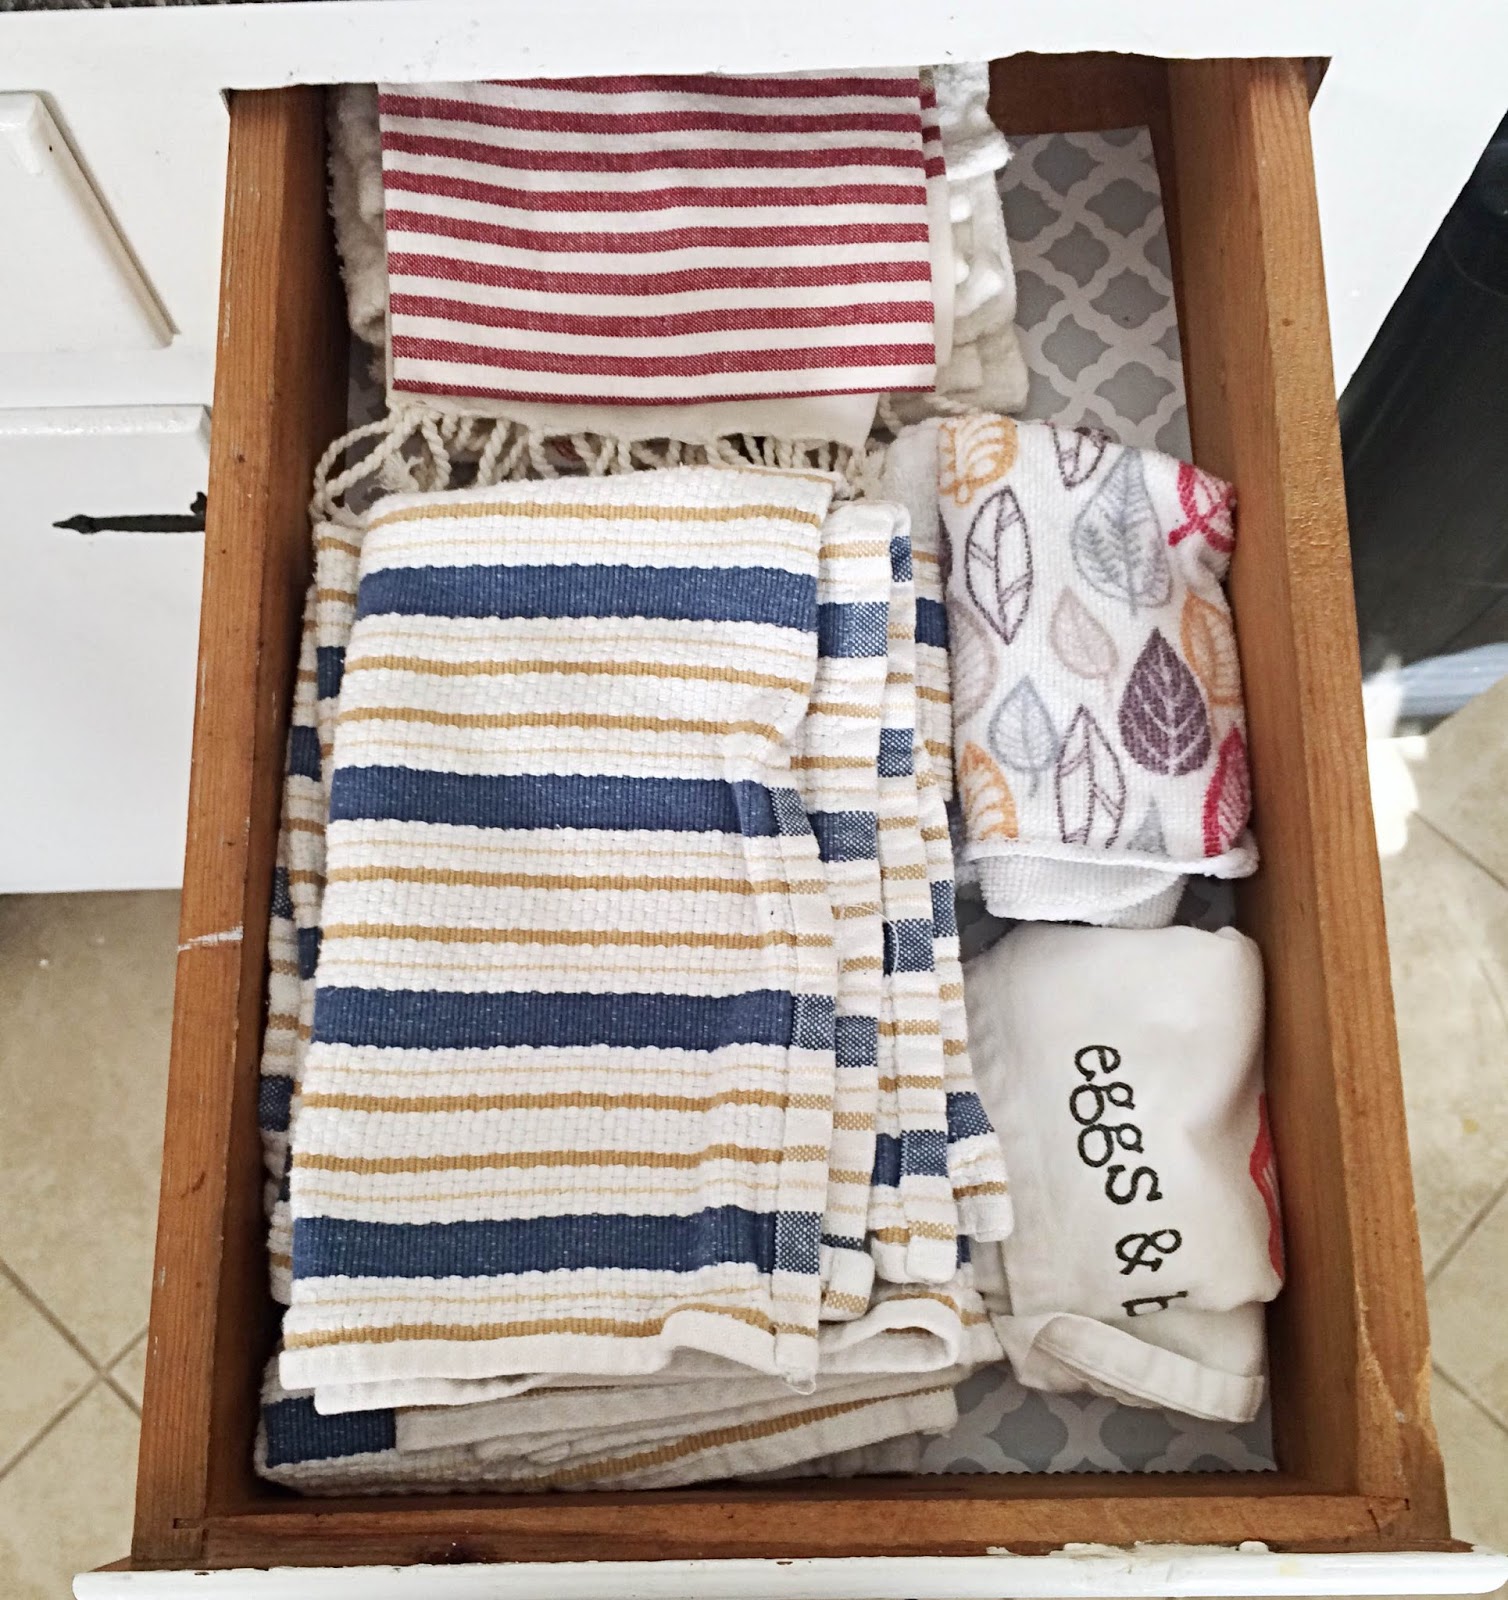

Tip 11 is to keep your drawers and cabinets organized according to usage. Keep like-minded items grouped together for easy storage and location. Basically, you don't want your cooking utensils opposite of the stove because that's mostly where they get used. You don't want your coffee mugs far away from your coffee station and so forth. As far as drawers go, keep them simple + don't be afraid to use little containers inside your drawers. They're great for keeping things separate + neatly organized. Don't overcrowd them. If something isn't used often, GET RID OF IT! I can't preach that enough. 


My final tip is in regards to countertops. The less you have to keep on the counter the better. Countertops are another cluttered area that people don't even consider. Cleaning off your countertops can do wonders for making your kitchen appear larger + cleaner {even if it's not really all that clean}. Only keep the necessities on the counter {for us that's the coffee pot, the spatulas, the microwave {because we don't have one above the stove}, a candle, and the fruit bowl. Literally, that's it! Everything else that we could possibly need is purposefully and thoughtfully stored in our cabinets. It's never been an issue to keep most things in the cabinets instead of on the counters. It gives me more room to cook + it is FAR more appealing to walk into a kitchen with cleared countertops than cluttered ones. So, my FINAL TIP {#12} is to keep your countertops cleared off + only display the necessities!

I hope this has been helpful and if you are still reading, hats off to you. Go rest your eyeballs now. :) Join me next Monday for another post in this series all about organizing your pantry + linen closet! XO!




Monday, March 28, 2016

Tackling Clutter # 1: TOYS!

I've been a little MIA because of the holiday weekend, the gorgeous weather, and the fact that I've been trying to determine what I want my next "series" to be here on the blog. The My Monday Round-Up series was fun for me, but I need a switch. I've tossed around several different ideas and because I got such a positive response from the before + after {of my mom's} office space post, I've concluded that for the entire month of April, every Monday will focus on tackling clutter. Each Monday I'll focus on one space/item at a time. Today I'm going to focus on TOYS + how to eliminate/store them efficiently, so that they're used regularly + out of the way when not in use. I realize this won't appeal to everyone, but don't fret. This will be the only "kid" related post in this series. I was going to do kid STUFF in general, but that is far too broad for this one post, so I'm going to stick to toy organization. If you have kids, then you know that this is probably what stresses you the most. So many toys, so little time. Am I right?

I've posted before about how I organize Emerson's toys, but even since that post, I have gotten rid of a lot in an effort to declutter and minimize. The more I watch her play, the more I realize she really only plays with the same 4-5 toys anyway. I'm willing to bet that your kiddos are the same. I will preface this by saying  that I did not donate ALL of her toys. I did keep in mind that in a few months or even years, some of the toys she owns now will be beneficial for years to come. With that being said, let's begin.


This picture was taken just a couple of months ago actually. It shows one of two bookcases in Emerson's play room. {DIY Tip: want to bring some 'pop' to your bookshelves, add a fun wrapping paper to the back of the bookcase +reinsert the shelves}. Furniture wise, her playroom houses 2 identical bookshelves, a side table with hidden storage, a daybed {used as a couch}, an IKEA Lack table + kid's chairs, + a leather recliner {not pictured}. The side table houses some of Trey's items that he doesn't want her to get into {the bed is right next to the table, so there's no possible way for her to get into it}, and aside from under the daybed, there is NO hidden storage in here. That means that all of the toys are visible, but that's okay! They are organized in a fashion that makes them visually pleasing to the eye, as opposed to an just being an eye sore, as toys typically can be. I keep 90% of her toys in this room. As I've mentioned before, she has 2 baskets that house a couple of toys {one in her room + the other in the living room}.


Go into every room where your children have toys and collect ALL of the toys. Before moving forward with the tips outlined below, all toys should be in one location. It will be overwhelming at first, but just hang with me. 

Toys Tip 1: Create 2 piles. Pile 1: what gets used regularly {like daily or on a weekly basis} and Pile 2: what goes mostly/always untouched {this is the donate pile}. If it's too gross to donate, then you don't need it and you should trash it. If you haven't seen it in ages, chances are your kids won't miss it. You will have 2 pretty large piles, if you're anything like me when I first started this. Emerson is only 1.5, so I didn't really ask for her opinion on what I kept/donated, but I would advise that you do the same, even if your kids are older. YOU KNOW what they use and what they only touch occasionally. Feel free to let them help, but they'll be kind of like my mom was last week...wanting to suddenly keep something they don't particularly even use just because they "might" want it eventually. No. No. No!

Toys Tip 2: Once you've decided what can go, DONATE IT IMMEDIATELY. Do not hang on to the bags {or boxes} of stuff for two reasons: you're kids will find it and suddenly act interested for like 5 minutes, AND it distracts from the tidying/decluttering process. Getting unwanted/unused items OUT of the house ASAP helps to see what you have left to work with and eliminates extra unnecessary "stuff".

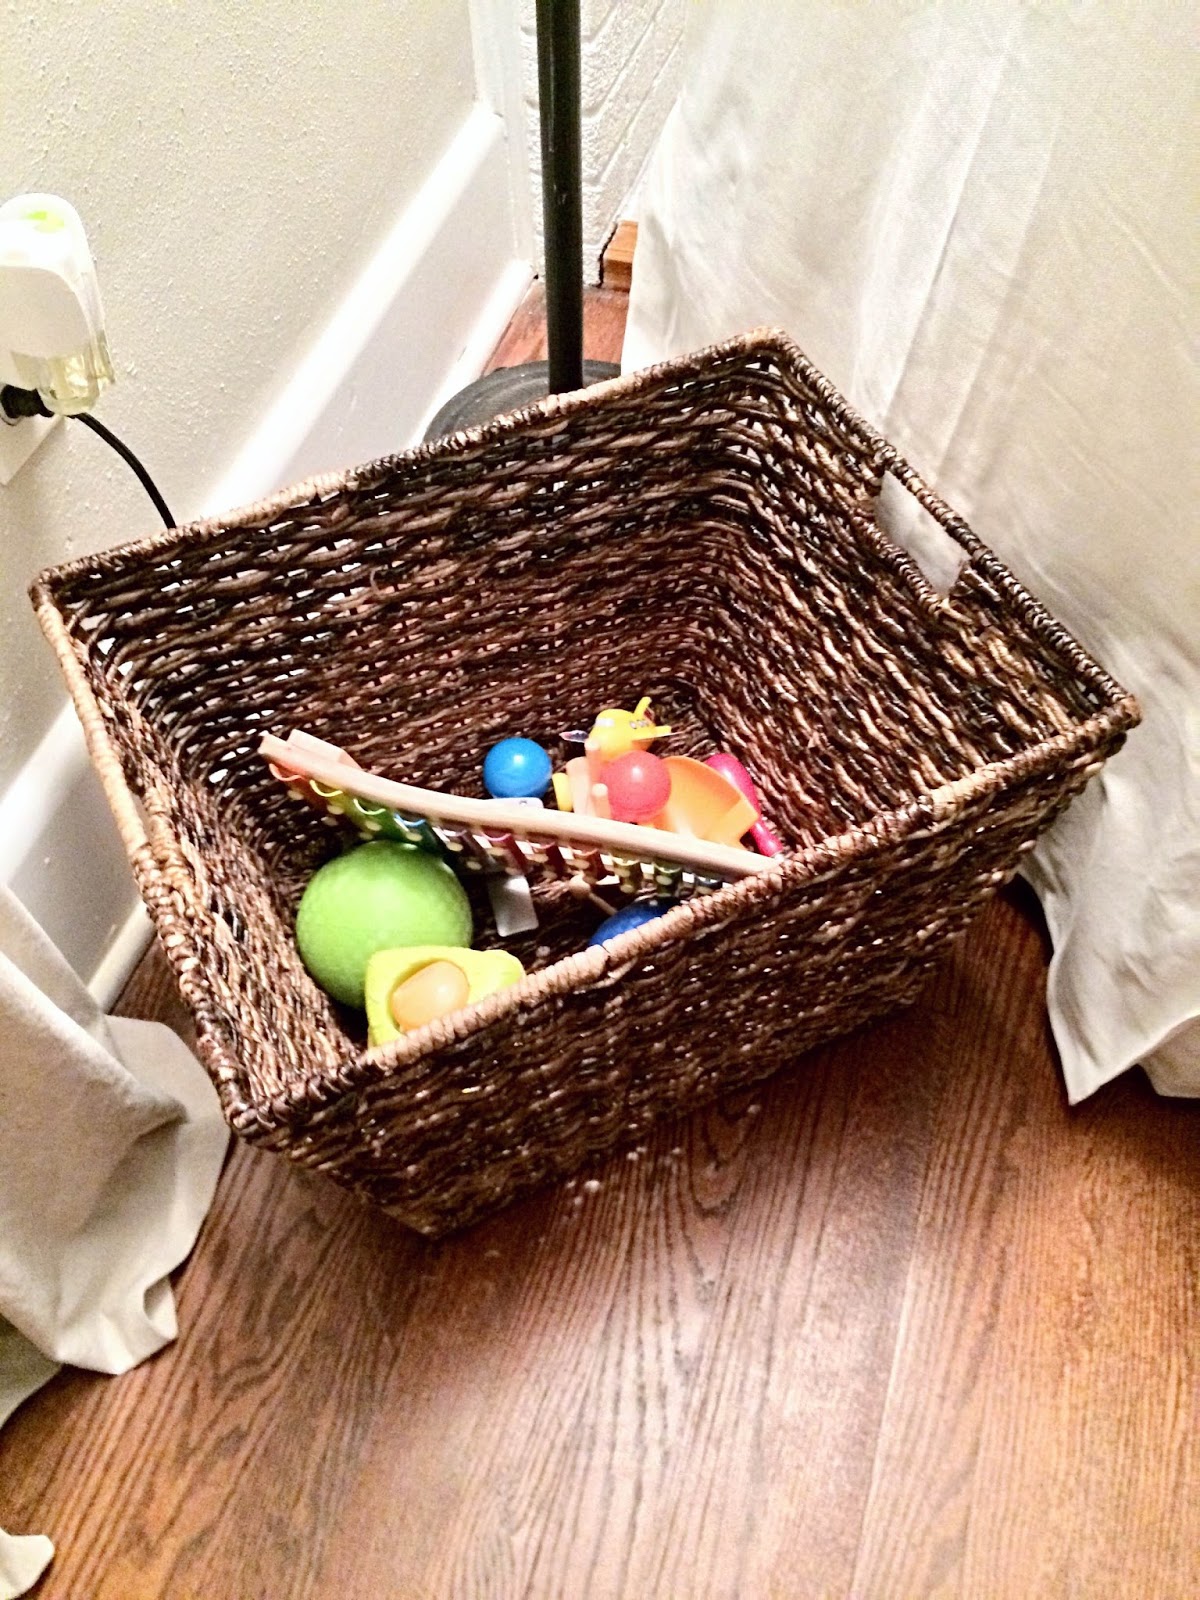
Toys Tip 3: This is my favorite one. Utilize baskets, crates, or anything of that nature. You can see below that I use these white crates from the Dollar Tree. I bought 8 of them; 4 for this bookshelf + 4 for the other. Typically, I'd say narrow basket colors to 1-2 colors as not to get too overwhelming to the eye {if they're visible anyway}. I like white because it just screams crisp + clean. Like I mentioned, I use wicker baskets in her room + in the living room to conceal her toys because it coordinates with the decor in each room. The toys are still easily accessible to her, but they're hidden from us when not in use. You can see the living room basket tucked behind the arm chair in the picture below. It was purchased at Target. It literally holds like 5 toys right now. Her playroom toy baskets are brighter and more colorful because her playroom intentionally incorporates a lot of color.


Toys Tip 4: To piggyback off of tip 3, organize the crates by style of toy. For example, her legos all go in one basket, her art supplies go in another basket, her baby doll related items go in the same basket, rubber balls go in one, and so on. Her Legos used to be in a big Lego bag, but it wasn't the cutest thing and the handle broke. Plus, now they're much easier for her to access {and dump everywhere, lol}. I organized her books in crates in the playroom to keep them all looking tidy. I occasionally go through and organize them by size, but that gets a little tedious when my toddler pulls them off the shelf constantly. Having them all in a basket, at least keeps them together and orderly even if they're not sized accordingly. ;)  Below I've shown her drawing utensils basket {she has another one below it with art supplies, like paint + brushes} + her puzzles crate {which we actually just donated all of her puzzles because she doesn't used them. Now it holds all of her rubber balls that go with her ball pit tent-don't ask}.


Toys Tip 5: Books are considered toys around here, sort of. We read books A LOT, so she has A LOT of books. I got most of them from thrift stores {usually like 25-50 cents a piece} and/or from my baby showers. Just today, I went through all of the books on these shelves and on her rain gutter shelves that are in her room and donated probably 40+ books. She still has quite a few, but they're all ones that we've read within the past month. Any books that are just hanging out collecting dust, donate them! Books with special meaning go in a special basket on top of the bookshelf for us. All of her other books are free reign, but there's certain ones that I don't want susceptible to toddler rips + marks. If only there were a way to mark-proof the walls + rugs {palm to forehead}.


Now, I didn't mention all of the bigger items, like the exersaucer, the push toys, etc. These are so space-consuming, I understand. Honestly, I tried to purchase items that were collapsable for that reason. I keep a lot of Emerson's "baby" items under the daybed, or stored in the attic wrapped in garbage bags for future use by future babies. Just today, I went through and realized that some of the bigger baby toys that I was holding on to really didn't get used much when she was a baby-baby anyway, so I donated them. Honestly, Emerson liked being held... all.the.time. I did keep her exersaucer {non-collapsable}, her swing, her bumbo seat, and her play mat. Those items we used pretty regularly. Everything else went adios. If you have an itty-bitty still, then don't worry if their items are out and about. This was my living room when Em was little {pre-farmhouse dining table too}. Some stuff just can't be "hidden" and that's okay. I will say though, having a corner or a specific place for it for when it's not in use helps it to feel less central. 

And just for kicks, here's a before and after of her playroom. Holy brightness Batman!
 I hope this has been helpful. I threw this one together somewhat last minute, so forgive me. I was intending to do our linen closet for my first post, but wasn't able to get pictures in the daylight in time, so I'm hoping to do that next Monday. Like I said, this will be the only KID specific post related to decluttering, so if you didn't find this one particularly helpful, come back next week...it's sure to be relatable to all. :) XO!


Wednesday, March 23, 2016

Tackling Clutter: You Can Do It!

Happy hump day, friends! As a stay-at-home-mother with no school-age children, 'hump day' means absolutely nothing to me, but to all you 9-5 folks, you're halfway there! Join me for a drink because you better believe I'm having one currently. And if you're pregnant, MOCKtail time, baby {or wine...I had a little wine while pregnant, and my kid is awesome, just saying!}

I posted this picture to Instagram earlier. No, that's not my house in the background; not to put her on blast, but it's my mamas. God love her. She's borderline hoarder-status {not really, but it's pretty crazy how much crap she has}. She's decided she wants to completely declutter her home and get it organized so that she "won't be stressed". Oh mama, I'm your girl! She called on me for help...more like begged. So, I grabbed a McD's iced coffee {hello, straight sugar-it was my first time} and got to work!

My mission for today was to conquer my parent's "office space", which is essentially the little nook you see behind me in the picture above. It's a small space, but don't be deceived, the desk itself is quite large and it holds A LOT of stuff! Here are some before shots that I snapped real quick before I got started on this 2+ hour process {actually, that's a white lie, I had already somewhat started, and remembered I wanted to blog about this, so I took pics from that point}. Maybe you can relate to these pictures...if so, then keep reading, you'll probably benefit from these tips!


So, as you can see, lots of books, pictures, PAPERWORK, and random miscellaneous items. To keep this simple for you guys, I'm going to do a list of how I took this room from the disorganized, cluttered mess above to what you see below!


Let me start by saying this: DO ONE ROOM AT A TIME! Don't try to conquer every room in your house at the same time. I know some people that do this and it works, but in my opinion that creates more mess and more stress. I can't stand piles all over the place; one room is manageable because it's a means to an end. Multiple piles in multiple rooms makes organizing really difficult because you can't see everything at once. My mom has been on a declutter kick and she's been doing every room at once and she's stressing herself out. She had piles everywhere today-as in all over her house. I immediately told her that was her first mistake and that to eliminate extra clutter-induced anxiety, she needed to do ONE room at a time. Okay, once that little bit was clear, we moved on to the following.

1} I started by removing EVERYTHING from the shelves + cabinet. EVERYTHING! It went into piles: books, office supplies {writing utensils, stapler, tape, etc}, paperwork, decor-related {candles, etc}, and picture frames. Once that was complete, I did the drawers. Again, emptied everything out and organized by drawer {top: office supplies, middle: business-related paperwork, and bottom: file folders with all personal info}. The entire room was a DISASTER! Y'all my mom was freaking out telling me that I was giving her more anxiety than she had before I'd arrived. I told her "Woman! I am the queen of clutter-driven anxiety, so just let me work. I promise it will look a million times better in a few hours"}. I continued sorting items, while my mom went through every book you see {and then some}. She created piles so we could get a better idea of what we had to work with.

2} We created the following piles: Donate - Trash - Keep - Shred
These are self-explanatory, but anything that was not worth donating, she trashed. Any paperwork with crucial information was shredded, otherwise it was deemed trash. The 'keep' pile consisted only of things she LOVED! My rule is if I have to think about it's value to me for more than 10-15 seconds, it's not worth keeping. I'm so proud of my mom. She got rid of TONS of stuff. 95% of those books were donated today. GO MAMA, GO!

3} After the piles were obvious, we bagged/boxed it all for transport. Immediately, it was easier to see what we had left to work with. Mom could feel the stress melting away. Haha, not really, but I like to think I have that affect on people. ;)

4} I began by placing items back into the cabinet. Items that were more unsightly went back in the cabinet. Sorry for the super dark picture, it didn't look this dark when I took it. Ugh. Anyway, I organized the cabinet as follows: top shelf: bin with paperwork to be sorted by my dad, and checks, middle shelf: candles, and picture frames, + bottom shelf: notebooks containing a variety of personal/business related info + her bill holder.


After the cabinets were finished, I moved on to the outer shelving, which is visible to the eye from other rooms in her house. I knew this needed to be the most pleasing to the eye because it's what you actually see. I filled the shelves mostly with special pictures/framed art and her favorite books. The books you see on the second shelves on both sides are the ONLY books she kept out of the 75+ that she started with! Progress, people, progress! She was also annoyed that I turned her books pages out She can't see the spines, so she thinks it's weird, but HELLO? Joanna Gaines, is that you? If you haven't seen the show Fixer Upper, do yourself a favor and look it up on Netflix ASAP. Because all of the books are different colors on the spines turning them pages-out makes them look more coordinated; it's more pleasing to the eye. I can't wait to see if she keeps them like this or not. Ha, my dad will probably turn them around. I also moved their printer/scanner into the bottom right shelf, which freed up the whole right side of the desk {where the printer was previously}. I kept it very simple and used all of her existing decor. What a difference!


So let's recap with a BEFORE + AFTER photo!
If decluttering overwhelms you, then you're part of the majority my friend! Even though I love it, it even overwhelms me sometimes. It's can be an extremely overwhelming process, as many people {such as my mom} have a hard time departing with anything remotely sentimental. Just remember, as a general rule, if you haven't used it, looked at it, or worn it in more than 3-6 months {and I mostly say this time frame for clothes to accommodate for seasons}, you can probably stand to part with it.  When it comes to decluttering, creating clear cut piles {like I outlined above} and being strict about trash being trash will make all the difference! I caught my mom trying to get some items out of the "donate" pile today. DON'T BE LIKE MY MOM! If you said it could be donated, then donate it! If you put it in the trash, then it's trash! Don't second-guess, that's how hoarders are created!

I happen to love organizing and living a decluttered lifestyle. I'm not exaggerating when I say that every space in our home is organized strategically. It brings order, tidiness, and eliminates unnecessary stress. We have enough on our plates as it is, don't let clutter be "ONE MORE THING". If you just don't have a clue where to start, or you always start but end up feeling overwhelmed and end up QUITTING, don't! I can help! Shoot me an e-mail, a text {if we're close like that}, a DM on Instagram, a FB message, or a blog comment. I would LOVE nothing more than to help you. That being said, I am NOT a professional by any means, I just love living an organized lifestyle and love trying to help others do the same. My mom claims I have magic powers in this area. Hm...I think she's a little cray-cray, but she's my mama, so I'm not gonna' deny it. ;)  Hope this has been helpful! As always, all feedback is welcome! XO!


Saturday, March 19, 2016

DIY Heaven: Emerson's Room


 Welcome to the land of all things GIRL. If you have boys, then this post may or may not appeal to you. Let me encourage you to continue reading though because the tips I'm going to share are not necessarily gender specific; they just are pictured as 'girly' because, well, I have a little girl.


Today I'm focusing on Emerson's nursery, which really I feel shouldn't be called a 'nursery' anymore because even though she's MY baby, she's not A baby anymore. I'm going to refer to it as 'her room' from here on out. *tear* Emerson's room was SO fun for me to decorate for three reasons: 1} It's one of two rooms in our house {the other being her playroom} that incorporates lots of pops of fun color. As you've seen, the majority of our home is neutrals because they calm me. 2} She was my first baby and so I had time to do all the cutesy stuff that first time mamas get to do. I have a feeling any future babies won't be so fortunate {don't worry, they'll still have a cute little space too}. NO! I'm not pregnant. 3} I got to MAKE a ton of things for this space using very simple methods + cheap materials. Let's focus on the third reason today...all things DIY.

I haven't counted, but if I had to guess, I'd say there's about 8-10 DIY projects in her room alone. I told y'all I don't mess around. Ha. I think the easiest way to break it down for you is just by listing the projects below, each with a super quick tutorial. SUPER QUICK, I said, so that we aren't here all day. We all have children to chase, houses to look after, and errands to run.

DIY Sheet Curtains
Grab yourself one KING size flat sheet {you can grab an entire sheet set if you want to make pillow covers too!}, a roll of no-sew hem tape, and some black-out liner in the appropriate dimensions {optional}. Be sure you know the dimensions of your windows before you buy the liner + before cutting your sheet. I didn't have to cut any length off of the sheet because I hung them all the way at the ceiling. {P.S. This makes your windows appear taller + it lets less light in at the top}. I found this particular king size sheet set for like $10-15 @ Ross about 3 years ago.

Directions: Lay out the flat sheet + cut it straight down the center {vertically} to create your two curtain panels. Use your iron + hem tape to create a hem along the edges where you cut the sheet {the other edges should already be "hemmed" since it's a sheet}. Now, should you choose to add blackout liner {which I purchased at JoAnn's Fabrics on sale}, you can either use hem tape to attach it to each panel OR you can do what I did, and use drapery clips to hang the curtain + blackout panel together {that way if you ever want to remove the blackout liner, you can with no harm done}. That's literally all you do. SO EASY and way cheaper than buying 2 blackout curtains, which aren't ever really "blackout". The blackout liner that I used is like hotel blackout quality. NO LIGHT escapes! I swear this is part of the reason Emerson sleeps so well.

DIY Oversized Wooden Letter + Mobile

The wooden coral-colored "E" above her crib was made using cut plywood, a pencil, a miter saw {thanks to my dad}, and some paint. All I did was very carefully draw out an E on the plywood {I did measure prior + I did not use a stencil, though you definitely could}, then I cut along the lines using the saw. After that was completed, I sanded it down gently + painted it the coral color that is also on her closet door {remember, always use paint for multiple projects if you can}.

For the baby mobile, I bought a variety of scrapbook paper in different colors + designs, some clear fishing line, white twine, and a wooden knitting circle  with holes in it {I'm sorry, but I have no idea what it's actually called, but it's in the knitting section at Michael's and comes in a variety of sizes}.

Directions: Using a pre-cut stencil, I cut teardrop designs out of the scrapbook paper {probably about 30-40}. Then, I cut my fishing wire to desired varying lengths + I hot glued the teardrop scrapbook pieces to the wire. {Each one is double sided, so essentially you glue one piece on one side of the wire and then glue another piece to the back of it, so that the wire isn't seen if the mobile shifts around}. I hope that makes sense. Anyway, after attaching all of the teardrops, I tied each wire strand through a hole in the wooden knitting circle until there was one in each hole creating a circular mobile. After completing each one, I took white twine and looped it through the same holes, overlapping at times {see above}. It created a web-like effect. Then, I took the twine and gathered it up through the center, tying it into one knot + hanging it from a ceiling hook. This may be really confusing because it's really tough to explain + I don't have pictures to break it down step-by-step.

DIY Tent Canopy

This picture is really poor quality + it's almost a year old {pre-bookshelves}, but it's the best angle of the canopy that I have already saved on the computer. I actually have a whole tutorial for this already too. Click here to view. :) This was made using sheer curtains, a hula-hoop {or you can use an embroidery hoop}, and ribbon.

DIY RAIN GUTTER BOOKSHELVES

These bookshelves are one of my favorite DIY projects to date. Not only are they great for book storage, but they are cheap + SO easy to assemble. Plus, Emerson loves being able to access her books + see them from afar. She's obsessed with books {such a little bookworm already}.

Directions: Purchase a rain gutter with the end caps {4} from a home improvement store {they're not very expensive, I want to say like $10 maybe}, then saw it in half + add the end caps to each end. Use wall anchors + screws and put about 4-5 in each gutter to attach to the wall. Add books! :) THAT'S IT!

DIY Painted Closet Door, Cardboard Letters, + Fabric Lined Shelf

I'm hitting a bunch of minor DIY projects with this picture. Hang with me! The outside of her closet door is painted the same coral color that was seen on the wooden E above her crib. This is my FAVORITE part of her room. It adds such a pop + it actually really pulls the whole room together. The XO that you see on her gallery wall was made using a cereal box + some paint. I traced the letters onto the cardboard box, then cut them out + painted them. I attached them to the wall using 3M picture hanging strips. You could do an entire word if you had enough boxes {or just a big box}. Also, while on the gallery wall, the majority of the frames were thrifted + spray painted, including that little chalkboard {25 cents}, and the quotes inside each were free printables and/or from magazines. The little shelf on her "dresser" {which was actually a kitchen hutch before} holds more books + a basket full of diapers.  I covered the top portion of the shelf with fabric. All I did to adhere it to the shelf was add modge podge directly to the shelf, then I carefully laid the fabric over it {already cut to size}, then applied more modge podge over top of the fabric. I used a credit card to spread it evenly and to eliminate bubbles. I wanted to do the bottom shelf too, but I ran out of fabric. It's nothing major, but it does add a nice little flair to an otherwise plain jane shelf. :) It makes it feel like it actually fits the room. I love that hutch turned dresser/changing table because it has great storage behind those doors for things like diapers, wipes, medicine, and blankets. OH, and I added a strip of the same fabric to the bottom of the lamp shade using a little hot glue. I forgot about that little DIY. :)

I think I've covered most of the DIY projects in her room and I hope you've found some of them helpful. Do YOU have any helpful DIY's that you've used in your children's rooms that you think I would like? If so, shoot me a line and let me know what they are! I'd love to hear and/or see! XO!