Monday, February 29, 2016

My Monday Round-Up # 2

I'm backkkkkk. And as promised, I've come bearing gifts; gifts of the DIY nature, that is. Remember last week when I mentioned the new "series" I'd be doing on Mondays? {If not, click here to refresh your memory} Well, I am ready for ya! I rounded up 4 pictures this week that were pretty good depictions of life around here.
Top left to Bottom Right:


The first is the wall above the fireplace + the mantle, which is one of the most drastic transformations our home has undergone. This fireplace used to be dark red brick. It was a major eye sore, until it got DIY'ed. It took 6 coats of white paint to cover that bad boy {honestly, probably could've taken seven, but I had serious claw hands after 6}. In the grand scheme of things, it's such an easy + pretty cheap update that will totally change the look of your fireplace. In addition to the paint, we added a reclaimed wood wall behind the tv + widened the mantle with a piece of wood as well. The wood was free {from an old abandoned barn}, the paint was already on hand, and the labor was free, so this entire project was F R E E for us {aside from the paint roller + drop cloth}.  Free is good.


I shared a different view of our living/dining room this week. It shows the view across from the fireplace looking towards the entryway. I'm standing in the far corner next to a double window, for reference. This picture features my dad's handiwork with the reclaimed wood farm table that he gifted me for Christmas this year {also free wood from an abandoned barn; he's got connections in the form of a truck + good eyeballs}. Our chairs are from Overstock and I love the dark metal spindle feature with the wood seat. You can also see my antique fan that I found on Craigslist for $10 years ago, and my DIY painters drop cloth curtains. But the real star of this picture, as you'll see later in the post, is the DIY light fixture. Stay tuned.


You probably saw this picture already on social media, but if not, it was a picture I posted as part of the hashtag #mombiesrise, which is a fun little tag on IG for moms to post pictures of their mornings. Well, this particular morning produced my favorite picture of all time and my most popular picture on Instagram...ever {well, aside from maybe Emerson's birth announcement}. The company that made the shirt reposted my photo to their IG account and it was also their most liked picture ever to date with some 1200+ views! {What? So cool!} Totally unexpected, but they even offered me some free merchandise for it. I'm always game for comfy graphic tees {and like I said, free is good}. Anyway, her face paired with the saying on my shirt is the most hilarious thing I've ever seen. I did not bribe her or prompt her to make that face; it was all her and just a perfectly timed snapshot. :) You're welcome.


This is a portion of Emerson's room, which I briefly mentioned in last week's Organization: Emerson's closet edition post.  I painted her closet door back before she was born. The room was lacking pizazz + so I went for it. It is seriously one of my favorite things in our house. It's so colorful + really brightens her room. I also loved that this picture captured a view in the mirror of the painted wooden "E" that my dad and I made for $8, and also the raindrop mobile that I DIY'ed using scrapbook paper  + yarn.  The "X+O" on her gallery wall above the changing table is made out of a cardboard box that I cut out using an X-acto knife + simply painted to match her room. Another fun fact: her changing table "dresser" is the bottom portion of a kitchen hutch that I used in our kitchen once upon a time. I removed the hutch and painted the whole thing white. Works like a dream + great for storage. Oh, and that little pillow on the door was mine + it still plays lullabies 28 years later. How sentimental.


The star of today's post is the light fixture in the picture above. In our connected living and dining rooms, we do not have overhead lighting. I don't mind using lamps because they're cozier anyway, but it was kind of annoying not having a light over the table whenever we'd have guests {which isn't all that often, but still}. I was bored one day over the summer and had lots of free time. Clearly, this was pre-Emerson {and remember, I used to have summers off as a teacher}.

I found a large white paper lantern on sale at Target for $10. I think they're usually upwards of $20, but don't quote me on that. Anyway, I bought it because I was originally thinking I could use it outside on our porch, but that was a bust, so I had to get creative. I had seen a couple of pictures on Pinterest related to creating a mini-version of this fixture using coffee filters and a hot glue gun. Easy enough, right? Well, 5-6 hours later and approximately 35 burns in, I had completed this monstrosity of a light and I LOVED IT. I still love it to this day. It is one of the first things people see when they walk in this room + always one of the first things to receive compliments. I have to be honest and say that I am really proud of this DIY. Not only does it make a huge statement, but it creates such soft lighting at night, that it's just perfect for dinner guests, or a romantic dinner with the hubs...because you know, we do that often, in all of our free time...

So, how did I make it? Like I said, I bought the lantern {I'm sorry I don't know what size it is, but it's larger than the standard 10"}, the coffee filters {like 500-600} and hot glue. LOTS OF HOT GLUE. To begin I assembled the lantern, so that it was round + full. Then, I took one coffee filter at a time and pinched the inside of it so that it crumpled up in the center brining all of the edges together like seen below.


I added hot glue to the pinched portion and stuck it to the lantern. I literally did this about 5 million times {or 600} until the entire lantern was covered and full-looking. Then I put a metal eye hook in the ceiling + hung in from that. My lantern has a cord that plugs into the wall, so I had to "swag" it, if you will. Luckily the cord is white, so it blends in with the ceiling fairly well.

That's it. It's such a simple DIY, but it makes such a big impact. As I've mentioned, it does require a lot of patience, and I would recommend wearing heat-repellant gloves. {I'm kidding, but only kind of} This would be a terrific DIY if you wanted to group a couple of small lanterns together, for a less time-consuming option, or if you wanted to go big, then try this one! I've also seen where people dye the filters using coffee to get a stained effect. I prefer the white personally, but hey, could be cute.

If you give this DIY a try, be sure to send me pictures or tag me in a picture of it! I would LOVE to see your creation! Thanks for reading. Until next Monday...XO!




Saturday, February 27, 2016

Mom Guilt: For the Days of Doubt


Oh, the infamous "mom guilt". You know exactly what I'm referring to. It's the times you say to yourself, "Did I seriously just do that?" or "I'm the worst mom ever". If you're a mom, you've been there. You've thought to yourself how much better you COULD BE than what you ARE.


Let's quash that mindset. You ARE better. Give yourself credit. Allow me to put it into perspective using a recent personal anecdote.

It was 7:15pm, 15 minutes away from bedtime and already I was "behind schedule", which meant Emerson would probably start getting overtired and cranky any minute. "Grrrreat, I can't wait to listen to her cry + refuse to go to bed", I thought to myself multiple times. *mom guilt*.  I gave her a late dinner that night because I was too tired to get anything together at the time when we normally eat. *mom guilt* I finally fed her frozen chicken nuggets {probably the processed kind that's against all mommy rules}, and some peas I found in the fridge that had been previously reheated about 5 times, so they resembled raisins more than actual peas. *mom guilt* I let her eat a yogurt by herself because I didn't feel like feeding it to her. *mom guilt* The result: YOGURT EVERYWHERE. When she began waving her hands + repeating furiously "All done!", I stripped her clothes off right there while she was still strapped into her highchair. The battle of the clothing was not going to be fought this night. I just wasn't in the mood. *mom guilt* YES, bath time, which meant it was finally almost bedtime. Thank God, bedtime was drawing nigh; the possibility of sitting down + not playing ring around the rosey for the 85th time was in sight. *mom guilt* She was playing independently in the tub with her doll and her balls . {Okay, that came out wrong. Let's just not even go there. They're round fabric objects that are made for the tub.} I was sitting right beside her scrolling through Instagram, not playing with her. *mom guilt* That's when it happened, "PLOP". Yes, she had pooped IN THE TUB. What made it worse was that I didn't realize it right away, so my precious girl was playing in the tub with a turd {or four} floating around. *major mom guilt because that's disgusting* After leaving her butt naked on the bathroom floor while I attempted to clean the poop-infested waters, I realized she was covered in goosebumps, because after all it is winter. *mom guilt* By this point, it was well past 7:30, Emerson's usual bedtime. I went to pull out her fleece pajamas only to find that I never actually washed them as I had intended to do that day. *mom guilt* We improvised and were rounding third base on the way to home plate (bedtime!), when I realized I had no whole milk left to give her in her nighttime sippy cup, all because I neglected the grocery store on purpose that day. *mom guilt* I did manage to read her favorite book + find all 3 of her baby dolls. I rarely let her sleep with them because all she does is play, but that night, the mom guilt was weighing down hard on my shoulders. She slept with all 3 baby dolls, one of which was filled with water from being in the poop-infested bath water earlier in the evening. *mom guilt, again* It was now 8:15pm and finally, she was asleep. I pulled her door shut + made a beeline for the couch. I plopped down, practically belly flopped really. I was DONE. My job for the day was finished. *mom guilt- how could I think that about caring for my own child?*

You see, all of that took place over the span of about TWO hours. And how many times did I feel guilty about something that I had done during that time span? If you kept track while reading, you'll know it was 13!! Thirteen times that I, MOM, felt guilty for something that I'd done {or not done}. Why are we so hard on ourselves as moms?

Here's something I've been preaching to myself for many months now. It's OKAY to not be a perfect mom. In fact, there's no such thing in existence today. Even the most put together, well-to-do, Insta-perfect moms are not actually perfect. We ALL feel less than worthy of this title of "mom" at times. I think it's part of the territory. Part of the beauty of being a mother are the times that you fail, but you pick yourself back up and try again anyway. It's the times when life punches you in the throat and you punch it right back. You know what, my daughter eats pureed pouches in order to get veggies most days + she eats frozen chicken nuggets + her fair share of boxed 'processed' snacks. I know some of you are judging me right now without even realizing it, which is okay. Because honestly, so many times I feel guilty for my lack of concern about her well-being in the nutrition department, but that's just it. I shouldn't feel guilty because even though I may not give her the best of the best all the time {in my defense, her pouches are organic!}, you know what I do give her? I sit with her daily + give her cuddles, just mommy + Emmie cuddles.  I talk to her during every meal {fiiiine, most meals}. I get on the floor and play with her multiple times throughout the day. I listen to her ramblings and I teach her numbers, and words, and animal sounds. I pretend to put her baby dolls to sleep approximately 348 times per day. I pick her up when she stands at my feet and says "mama, up-uppy". I attempt to comfort her even when I haven't a clue what's bothering her. I get up with her in the middle of the night when she's frightened, or teething, or just wants to be with me. I may not have all of my ish together when it comes to this mommy thing, but I am her biggest advocate, and she is my absolute biggest fan!

That's what we have to remember moms: Our kids love + root for us NO MATTER how many times we fail each day. Just as we love them despite their tantrums and diaperless poop escapades {or maybe that's just me}, they love us. Despite our lack of energy, 3-day-old hair, and yes, even when we raise our voices, they love us. Your kids won't punish you because you didn't give them enough of yourself. Ehh, that might be a little white lie. But, my point is, on those days of doubt, don't let your shortcomings in the "mom" department make you feel like you are failing your children. You are their MOTHER. You are better than anyone else at that role. Un-wad your panties and OWN IT, GIRL.


Thursday, February 25, 2016

Soft + Cuddly: What Dreams Are Made Of

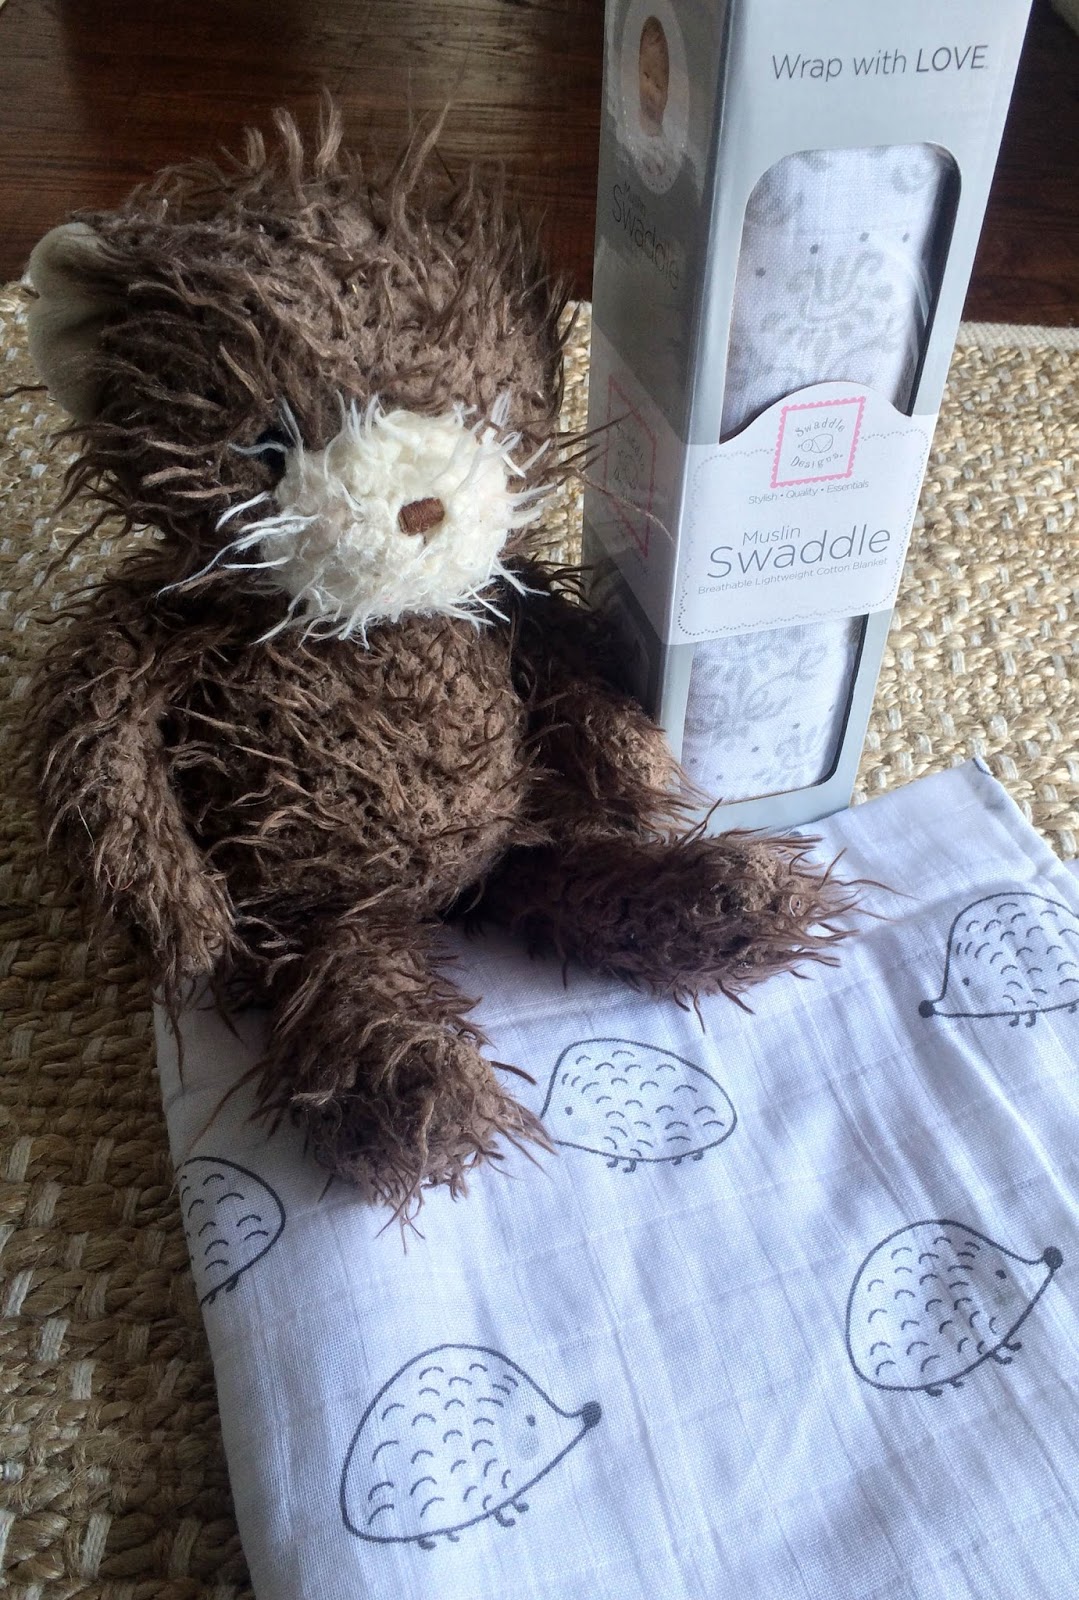
Hedgehogs remind me of porcupines, even though apparently {according to the gods of Wikipedia} they are quite different. They are prickly and they have the ability to roll into a tight ball as a defense mechanism. Sounds a lot like my toddler daughter first thing in the morning. HA! Seriously though, I will never ever own a hedgehog, I can promise you that. Well that's unless of course you're talking about the soft, cuddly type like the one we got below. Don't believe me? Take a look.


Did you think I went near an actual hedgehog, let alone BROUGHT ONE INTO MY HOME? If you're new here and you trusted me that much, then I'm flattered, but didn't your mother teach you not to trust a stranger? In all seriousness though, I did get ahold of some hedgehogs in the form of a blanket. It's quite possibly the softest, most adorable blanket we own. I have the one pictured above, along with this one pictured below. Both are feminine without being overly "girly". They are perfect for Emerson and she LOVES them, especially the ones with animals {her current obsession}. Today, I want to convince you to not only start loving these blankets as much as we do, but I'm hoping to help you WIN a fantastic prize for either yourself or a friend. Don't stop here, keep reading to find out more!

These precious blankets are a creation of Swaddle Designs, which is a stylish boutique-quality shop known for their great quality products and their long lasting value that moms and babies love and can enjoy for years. I am OBSESSED with their adorably soft + cuddly muslin swaddle blankets! Not only are they of tremendous quality, but they are quite large, making them great for swaddlers and non-swaddlers alike. As a new mom, I hated having to re-swaddle Emerson fifteen times because the blanket would come untucked just as I was putting on the finishing touches. Even worse than that though, was the Houdini-like nature of my child in the middle of the night as she escaped her swaddle. With these Swaddle Design blankets, that's NOT an issue. They are larger than standard size swaddle blankets making them perfect for little Houdini babies like mine. Also, each blanket includes a SwaddleClub and 123 Swaddle label sewn right into the blanket, making learning how to swaddle a breeze. Take it from me, that little label is a helpful tool when it's 2am, you're sleep deprived, and you can't quite remember how to wrap that baby up like a burrito. It sure beats having to Youtube a video on "How to easily swaddle your newborn" in the dead of night with a fussy baby. Their easy 123 instructions make swaddling easy even for the newest of mommies and daddies!


So easy, even a toddler can do it! ;)
What's especially appealing to me as a mother and a consumer is great quality + functionality at a great price. We all know that I not only love a bargain, but I love when something, especially baby gear, is mutli-functional. Babies aren't cheap, and neither are their accessories, but I can honestly say that these blankets are worth every single penny. Plus, they stack up very nicely with surrounding swaddling blanket competition. {Trust me, I did my research.} They have a variety of prints and colors, but I'm especially drawn to the black and white designs, as that's more uncommon in the baby world {in my opinion}. I decorate our home with a lot of black and white, so I love that Emerson's baby "accessories" tie in with that. You can check out all of the designs and colors using the information I've included at the end of this post. Trust me, you will want to take a look!


The blankets, as I mentioned, are high-quality cotton muslin, so they're lightweight and soft on baby's delicate skin. Emerson, bless her soul, has very sensitive skin like her mama, so the lightweight cotton material is my go to material for her all of her blankets. She is 18 months old {tomorrow!} and she sleeps with her muslin swaddle blanket at every nap + every night, along with her furry friend {"May Bear"} + one of her favorite books.


I can't imagine NOT having these blankets. I was gifted tons of receiving blankets and crocheted blankets as baby shower gifts, and while I love them all, none compare to the muslin blankets that she sleeps with every day and night. Not only do these Swaddle Designs blankets get softer with every single wash, but they are such great quality, that they hold up to even the toughest of toddlers! We can't leave home without one and you shouldn't have to either! 
Lucky for you, you don't have to any longer! In honor of Emerson making it halfway to two years of age + Swaddle Designs being the amazing shop that they are, I will be hosting a G I V E A W A Y on Instagram starting tomorrow, February 26th through Sunday, February 28th. It will run from 8:00 am EST Friday {tomorrow} through 8:00am EST on Sunday. The winner of the giveaway will win not one, but TWO Swaddle Designs muslin swaddling blankets from their black and white collection. Be sure to go look at the designs on their website because if you win, you get to choose which two you would like to own! Be sure to follow me on Instagram @alittlethriftychic in order to participate in the giveaway, and please spread the word to any mommy friends that you think would enjoy this great prize. The giveaway is super simple to enter and their are NO OTHER HOSTS, just me! Make sure to enter before 8am EST on Sunday! The winner will be announced Sunday night on Instagram. Good luck and be sure to check out + follow Swaddle Designs at their website, on Twitter, Instagram, and Facebook. All information + links are posted below. You can also sign up for e-mail updates to hear about new arrivals and get the inside scoop for special offers and promo codes to score you some great deals off of regularly priced items! Now that's speaking my language!

* Visit www.SwaddleDesigns.com and choose your favorite product. They have tons to choose from!
* Follow @SwaddleDesigns on Twitter and tweet about your favorite @SwaddleDesigns print or product
*Follow @SwaddleDesigns on Instagram
* Like Swaddle Designs on Facebook + post your favorite print or product. {P.S. Facebook fans get the inside scoop, previews of new collections and fan discounts.}
* Pin your favorite product on Pinterest 

 Go NOW! Don't delay! See you on Instagram tomorrow for this awesome giveaway! XO!


Tuesday, February 23, 2016

Organization Makes the World Go 'Round: Emerson's Closet Edition

Organization should've been my middle name. Chelsea Organization Lanford. Yep, has a nice ring to it, don't you think? Mom, why didn't you think of that?!

But for real, do you love knowing where things are and having things appear orderly? If you're anything like me, you thrive on it and you feel anxious when it's otherwise. This is particularly true for me when it comes to our home. I may not be great at organizing paperwork {it could've used serious help when I was teaching}, but otherwise I'm ALMOST a pro. I love lists. I love baskets and bins. I love labels. I love not having clutter, as I've mentioned before. I love all things organizational, which leads me to today's post on Emerson's closet. My hope is that this post will give you some ideas on how to organize all of your kiddos' clothes, shoes, and other random crap. I'm not going in depth as to where everything goes in her entire room because you'd literally be here for far too long, but I am going to zero in on her closet and how I keep it "decorated", organized and uncluttered. Shall we begin?

Due to the size of her room {which is almost no longer a nursery *tear*}, her main dresser is in her closet. She does have another "dresser", if you will, that houses diapers, wipes, blankets, + her changing pad {which is also almost a thing of the past}. Her closet is a decent size. I haven't measured, but I'd guess it's about 4ft wide by 8 ft tall by 2-3 ft deep with one main clothes hanging rack + a high top shelf. To keep this post organized and as least confusing as possible, I'm going to separate each "part" of her closet as a new paragraph, so hang with me. Don't let all of the words scare you away, they're helpful, not hurtful. * Pinky swear *


Let's start with her dresser. My brother was tossing it after he moved out of his college apartment, and rather than let a perfectly functional dresser be buried in the trash, I swiped it. It was originally brown, then he painted it on two different occasions, I believe. A DIY'er after my own heart. HAHA. Anyway, when I got it, I think it was a weird greenish-grey color {no offense bro, if you're reading this}. I used some light grey paint I had on hand to repaint it. Then, I added some $1 yellow knobs that I found in the dollar bins at Michaels and some drawer liner from Dollar Tree {that actually is really cute + matches her room perfectly}. In her dresser I store the following items:
TOP DRAWER: leggings + pants of any sort {she has entirely too many, but they're SO cute}
MIDDLE DRAWER: socks, tights, and pajama sets {not footed though}
BOTTOM DRAWER: all of her shoes {no real organization honestly, they're just thrown in there}


On top of her dresser is a gifted picture frame {also yellow} from one of my baby showers. Inside the frame is one of the 15+ game cards that were played at my shower. I rotate them periodically so I can see what my friends wrote. I loved this little game + it's a fun reminder every time I open her closet. I  store all of her medicines {Tylenol, Zyrtec *dang allergies*, Nose Freda, etc} in that wicker basket. And the most asked about piece in her closet: her headband holder. It's actually just a standard jewelry holder sold at TJ MAXX + similar stores, that is meant to hold necklaces + bracelets. My mom gave it to me + it isn't really my style to display jewelry, so I repurposed it + now it holds all of her headbands {mostly DIY by the way-click here if you want to make some of your own like those seen below}. 


You may be wondering what that random silver bar is going across the picture. That's actually a tension curtain rod that doubles as a clothes rod because the existing one wasn't large enough to hold everything. I don't hang clothes on it anymore because I purged her stuff {Shh! I know you can't even tell. She's got SO many clothes}, but now it holds extra hangers, which yes, are organized by color {light pink, white, and hot pink}. I can't stand the hangers that clothes are sold on, and I like uniformity, so this helps with that. On that same note, all of Emerson's clothes, aside from what's in the dresser, are hung up like you see in the picture above. I hate wrinkles + folding, so this was the obvious option. Plus, I like being able to see everything without having to dig through tons of clothing to find what I want. Her clothes are organized by style {onesie, dresses, short sleeve shirts, long sleeve shirts, footed pajamas, coats, etc} AND by color. You may think I'm crazy, but hear me out. I do it this way for two reasons: 1} it's easy to find what I'm looking for + to hang things back up easily and 2} It helps daddy pick out outfits that match. ;) 

The plastic Sterilite drawers seen beside her dresser were taken from my classroom when I "retired". I needed a few extra storage places for pacis, receiving blankets, hats/mittens, and other random baby items. All I did to spruce it up a bit was add some scrapbook paper cut to size to the front of each drawer. So even though it's not high-end or anything {shocking, I know}, it helps it appear a little less "cheap", plus it matches her other room decor.


Finally, are the inside of the door and the top shelf. The door has a white over-the-door hook that has like 10-12 separate hooks. It holds her bibs, lightweight jackets, swimsuits, and her scarf. Yes folks, she has a plaid scarf that mimics my blanket scarf. I found it at Goodwill for $1 and I couldn't resist. She absolutely hates it and it was a total waste of $1, but I'm keeping it in hopes of her wanting to "be like mommy" next winter. *FINGERS CROSSED* The top shelf is not ugly, but it's not super attractive either. It houses labeled {by size} plastic storage containers full of baby clothes/gear/books that I'm holding onto in case of another baby girl in the future. Should I get pregnant again + it be a little boy, I'm going to be sad to depart with all of these super cute clothes, but that just means my friends will have great free stuff for their baby girls and/or I'll have some fabulous stuff to sell.

So that's Emerson's organized closet tour. I hope you found it helpful, and if anything in particular caught your attention, please share with me! Or, if you have any great organizing tips related to children's items, I always love + appreciate your feedback! 

P.S. My blog got a little makeover too! Whaddya think? XO!


Monday, February 22, 2016

My Monday Round Up # 1

Well, the weekend is over and it's back to the grind for most of you. If you're a stay-at-home-mom like me, then today isn't a WHOLE lot different than yesterday, or the day before that for that matter. Aside from the fact that I tend to be a little lazier/laid back on the weekends, my week days don't differ too much from my week ends. Regardless, I did have a great weekend, primarily thanks to the beautiful 60+ degree weather! Sadly it's back to gray skies and 40 degree temps today, but I've got a little something to share that will hopefully take your mind off of the cold temps for a bit.

For the past month or so, on Sundays,  I've participated in a hashtag challenge on Instagram called "MySundayRoundup", and basically it's purpose is to post a collage of pictures that summarizes your week. It's fun for me to look back at what I've posted over the week and create a conglomeration of photos that not only remind me of the things I accomplished and/or the memories I made, but to also share that with others. After I posted yesterday, I got to thinking about how I've been racking my brain for weeks for a way to incorporate home decor regularly into this blog, while also still making it appealing to my mommy audience. Not everyone loves home decor + not everyone wants to read thoughts from my mommy brain, so I thought doing a mixture of both on a regular basis would be a happy medium. Here's what I came up with...

Starting today, I will be posting "My Monday RoundUp", which is just going to be the same collage of pictures that I posted the previous day on Instagram PLUS I'm going to include a DIY project that can be seen in one of the collaged photos, that can also easily be completed by my followers at home. The roundup for today includes the four pictures below.

The back of the front door was white until about 9pm on Friday night when I got the itch to do something DIY. I saw a picture on an IG account I follow of interior doors painted black. I've been wanting to do SOMETHING to the inside of our front door {so the back of the front door}. The outside of the door is bright blue, which I love, but I didn't want that blue on the inside because it doesn't go with the rest of the interior decor. It's been white forever, until Friday at 9pm anyway. Now it's a lovely shade of black, and I'm loving it...a lot. Wait, are there different shades of black? Is that a dumb question? 


The gallery frame wall is in our main hallway which encompasses all of the bedroom doors + main bath door. Last summer we replaced the 4 interior doors in this hallway from the standard hollow, non-decorative doors to decorative ones. It wasn't a "cheap" project per se, but it was TOTALLY worth it. The new doors completely changed the entire look of the hallway. So if you are looking for an easy way to update your house, the interior doors are a great place to start {whether it be replacing them or just painting them}. Back to the gallery frame wall though, which is going to be my DIY feature if you continuing reading. This wall was completed using 90% thrifted frames and 10% dollar tree/pre-owned frames. The frames encompass some of our most treasured memories of our family: Emerson's footprints, an ultrasound picture, a couple of our wedding photos, a journal entry from the night we got engaged, print outs of each of our home states, a gifted cartoon drawing of our family {pre-Emerson}, one of my brother + sister-in-law's wedding photos, and tons of other precious memories. It's definitely a statement wall in our home and I LOVE that I see it every time I walk in the door. It's SO easy to do too. {See below for more}

The old window frame was a $10 find thanks to my BFF, Leslie! The B+W picture inside is a $3 Office Max print {click here to read a previous post on how to get one for yourself in 5 easy steps}, and the surrounding frames were $1 wooden frames from Michael's that I painted and then inserted B + W photos of the 3 of us. The entire wall is seen below {I only inserted part of it in the collage}.

The last picture in the collage is of my daughter picking "flowers" for me, which I wrote about here. It was too precious of a moment not to include in my weekly collage. But, enough about the collage, let's talk how to make your very own gallery frame wall.


As I mentioned, most of the frames on our gallery wall were thrifted. I have to be honest, I do have "new" frames in our house, but the majority of our picture frames are either thrifted + repurposed or they were free finds. I ALWAYS check the thrift store for frames before I go out and buy them new. All it takes is some spray paint to turn an ugly frame into a beauty again, and usually frames {depending on size} are like $1-2 each. Half of these frames were wooden originally, some were already black but were super scratched up, and some were white/teal/brown, etc. I never ignore a frame based on it's color because that's such an easy fix. The majority of the prints inside the frames were printed on my home computer, though some did come from actual printing companies {like the photos of Emerson's first birthday or our wedding photos, for example}. The big print to the right of the bathroom door is of a parachuter. I found that at Goodwill for $1.50 and I just repainted over the existing frame so that it would match the rest. The "etc" sign was a really ugly wood that I painted black; also found at Goodwill for like $0.75. I believe I've mentioned this before in a previous post, but be open minded when thrifting. Don't look at things for exactly what they are, think about what they could be in the future. HAVE NO FEAR: MY VIRTUAL THRIFT STORE SHOPPING TRIP COMING SOON {more on that later in the week}.

Not only is the wall itself an easy DIY project that makes a HUGE statement, but also the art inside the frames can be another DIY. As I said, I printed a lot of these from the internet {the lips, bird, silhouette of the Jack Russell, some of the quotes, and many others}, but I also used pictures from magazines, a birthday card that Trey gave me {I LOVE using beautiful cards as art}, scrapbook paper, and a drawing that Emerson did. I tend to think outside of the traditional "use this frame strictly for a picture of people" and try to be more creative with what I put inside. There are SO many options out there; I've named only a few. The frames don't have to match either. Most of these in fact, are not similar at all. Some are really thick, some are thin, some are detailed, others are very plain. Painting ALL of the frames the same color though brings uniformity to the wall. It makes it appear cohesive even though the frames themselves are completely different. I painted our frames black because I wanted a greater contrast against the white wall. But, you could totally do colored frames if that's your thing, or for a simpler, crisper look, go all white. Also, this is a larger scale gallery wall. It can certainly be scaled down to fit a smaller wall or you could go more vertical or horizontal depending on your space. I do recommend cutting out paper the size of the frames + using painters tape to adhere the "paper frames" to the wall while you're deciding on a layout that works. Nothing worse than nailing 50 million holes in the wall, only to realize you don't like the layout. Additionally, I wasn't super anal about spacing between the frames, primarily because it's time consuming and I am lazy in that regard, but I tend did try to keep them all lined up on the right edge {as in not having one protrude out past the others}, but it doesn't always work and that's okay. They don't need to be perfect to be beautiful.

That's the key to any good DIY project: it doesn't have to be perfect to be beautiful. :) I hope you've enjoyed the first installment of "My Monday Round Up" and that you've found some inspiration here If you do in fact find some, be sure to share it with me. I'd love to see what you come up with! I'll be back next Monday with another week of home pictures + another easy DIY! Until then...XO!