Thursday, March 17, 2016

Her Success Is Not Your Failure

I consider myself a successful woman, mother, and wife. I also consider myself a failure at times, in all of the aforementioned areas. I have successfully created a home for us, while maintaining either a career or keeping a tiny human alive. I have created a community here where other women {and maybe men too} can feel comfortable and share in my life. I have had a lot of success in my lifetime thus far, but I have had equally as many failures. I fail to honor my Savior like I should. I fail to respect my husband the way that I'm called to in my marriage. I fail to always see the good in others. I struggle with self-doubt, anxiety, and jealousy on top of all of that. Since entering into the Instagram world to promote my blog and my passions, I have encountered women from all walks of life, most of whom barely know my name, let alone actually know ME. What they don't know is that they've impacted my life in a very profound way; in a way that touches on all of the successes + failures I mentioned above. I don't know how to explain it exactly, but I'm going to try.

See, when I first started blogging several years ago, I did it primarily to update family on the goings on of our lives, and then I slowly started gaining "followers", if you will. I used to get so excited every time another "view" would show up on my blog stats page. It became a bit of a trap. I was blogging to try to fit in, not to try to stand out. I posted what I thought people wanted to hear or see, and while there's certainly nothing wrong with appealing to an audience, the focus that I had was wrong. I set myself up for failure because I wasn't being totally myself. Several months ago, after my third or fourth brief hiatus from blogging, I got a renewed sense of passion + success. I found great joy in blogging and sharing my life with complete strangers {as opposed to JUST family + close friends} who shared my same interests, primarily motherhood and design on a budget. Finally, I felt like blogging, for me, felt like it should. It felt very right.

I found myself writing pieces for my blog very naturally without much thought, almost in a journalistic type fashion. I am continually sharing bits of my marriage, my motherhood journey, and my "tips" on how to decorate on a budget based on what I've done. I truly, truly LOVE what I'm doing and I think people can see that through this blog + through the pictures I share on Instagram/Facebook, at least that's my hope. I'm not getting paid for anything that I do {at this point in time}, but my time now is filled with more than just chores, taking care of Emmie {which I love}, and reality television.  I feel like I have a purpose and this is somehow part of it. I am sharing life with others, which is what God calls us to do. Sure, online relationships don't replace real life ones and I don't intend to let that occur, but it is really neat to see how God has brought some amazing women into my life through my short time blogging/Instagramming {from more of a "business" standpoint and less of a personal one}. I am so grateful that I found my niche.

Now, I'm about to detour slightly + get brutally honest for a minute because this has been weighing heavy on my mind for some time. I know I'm not alone in this. I struggle with Insta-envy. I see something that I don't have, and I get envious. I have determined some ways to squelch it, but it still finds me more often than not. My biggest point of contention right now is envy of other people's success, primarily as it relates to blogging/IG. I don't want to sound silly or petty, and hopefully I'm portraying this in a way that doesn't come across that way, but I'm struggling y'all. It's not that I don't support my friends and their accomplishments, because I most definitely do, but I struggle to find a balance between being supportive and being critical. I came across this quote a while back and I literally think about it every day.

Just because someone else is writing about similar content, or has a similar idea, doesn't mean they copied you or they think your ideas are a joke. It doesn't mean that they're perspective is better or worse, it's just different. Just because someone has been featured more widely across Instagram or has hundreds {or even thousands} of followers more than you, doesn't mean that people don't love what you bring to the table just as much. It is SO easy for me to be critical and judgmental when it comes to blogging or home decor. I will openly admit to that. But, I'm not ashamed of it because it's human sinful nature and THANK GOD, I have a Savior to rescue me from the depths of my despair. I am continually being challenged to remember that "her success is not {my} failure". God calls me to be a light in the darkness, and I want to make my voice heard, not because I want you to hear MY words per se, but because I want you to know that if you fight any of the same battles that I fight or if you find joy in any of the same things that I find joy in, you aren't alone. I think so many of us fight inward battles that we're too afraid to put out there for fear of rejection. Well, I guess I don't care if I get rejected because I just put it out there for the entire world. Just remember ladies, moms, bloggers, DIY'ers, that I support you even when sometimes I don't feel like I want to. Truth is, I really do want you to succeed, just as much as I want to succeed. Sometimes though, sometimes it's just plain hard to be happy for you, but I try my darndest every dang day.


Now, with all that behind us, go show some love to someone that maybe you'd prefer if just once they'd fail because it'd make YOU feel better. That's not a good mindset. Actually, it's really selfish, but we've all had that thought a time or two most likely. Ha. We are all just as equally screwed up, so let's be as supportive as we can and choose kindness, just like my bracelets preach. It's better for everyone. XO!



Wednesday, March 9, 2016

Welcome Home: Updating Your Entryway DIY Style

Today, I'm talking entry ways and I'm giving you a couple of super easy ways to update yours, DIY style, of course.

I shared an updated picture of our entry way on Instagram yesterday and got a HUGE response! THANK YOU, THANK YOU, THANK YOU for all of your beyond kind remarks! So many people commented on the front door and the wreath. Well, good news! Both of those are easy DIY's that you can do in one afternoon. But before I repost the updated entry way picture, allow me to share a "before" of our entry way shortly after moving in to our house. You have to get the full effect, and the only real way to do that is with a quick before and after. The entry way was NOT pretty, and neither was the living room, for that matter. My, my how my tastes have changed in just five short years.

BEFORE

AFTER

Paint is the easiest DIY in the universe. It can be time-consuming, but it's still pretty dang easy. Our front door used to be dark red {see above}. Our house is also brick, so it was all the B words: bland. blah. boring. I wanted the door to stand out. When we have guests, it's way more fun to say "yep, just look for the blue door", instead of "yep, look for the red brick house with the red door and the red stone front porch.". SO MUCH RED. I bought 1 quart of Valspar Duramax paint + primer {don't know if this is still a brand} from Lowes for about $15 in the color "Mackinac Blue". It took 3 coats to cover the front of the door, with plenty leftover. {The back of the door, on the inside, is black}. If you remember a few posts back in my bathroom makeover post,  I mentioned a tip about buying paint. When buying it, try to determine if you can use the paint for multiple projects to get the most bang for your buck. I used this one quart of paint to repaint all 3 exterior doors, so that they match. 


Now my yellow Forsythia wreath on our front door was actually a $2 Goodwill find several years ago, but you can make one for pretty cheap too! I just made one for our side entry door, and I'm going to "teach" you how to make one for yourself using the materials shown below.


I found this grapevine wreath at Goodwill about 2 years ago for like a dollar and some odd change. This is something I want to encourage you to do too! Look for wreaths at thrift stores, but look beyond what you see on the shelf! Look at the wreath underneath all the flowers, or garland, or whatever else maybe covering the actual wreath form. This one had disgusting, ugly fake flowers all over it when I originally bought it. I pulled them off + removed the excess glue, leaving it plain and exposed like this. {I actually use this one grapevine wreath for multiple seasons, so whenever I add decor to the wreath, I don't typically glue anything, so that it can be easily removed for the next season}. I bought these 6ft. yellow faux Forsythia vines at a local closeout store called Big Lots for $5 each {you could probably find something similar at Hobby Lobby or Michaels. Dollar Tree also sometimes has decent faux florals.}. So this entire wreath costs about $12 to make including tax. ;) Literally, all that I did was unwind the vines and wrap them about 4 times around the grapevine wreath form. I just tucked various pieces into the grapevine to hold it in place. Good as new and definitely cheaper than buying a new one. The cheapest I've seen for these is around $24, so making it in about 5 minutes for $12 ain't bad! Here's how it looks on the side entry door.


Three final ways to easily update your entryway are to invest in a basket in which to store clutter, add real greenery, and a chalkboard. My husband, God love him, literally has the most random crap stuff in his pockets, and he used to unload it all over the counters and the front entry table. Well, wifey to the rescue! I got this basket seen on the entry "table" below at Target for like $10 {p.s. thrift stores are great for baskets too}. My hubs can throw anything in it and I don't have to see it. It not only looks good, but it eliminates clutter from the tabletop. In addition to the basket, real greenery always looks beautiful. The plant seen below was a cheap indoor plant from Lowes that I potted in a $1 terra-cotta clay pot {I just painted it white}. Nevermind that it's never grown bigger than the size it is currently. It's literally been that size for like 2 years. Precisely why I don't have a ton of real greenery, but rather stick to the fake stuff. The last easy update is to add a chalkboard. This one was a friend of mines {thanks Tracy!} that I scored when she was moving. I added a mini glass vase {25 cents at Goodwill} with some faux pink + white tulips {the entire large bouquet -not seen- was on sale for $1 at a local home store}. 


All in all, this entryway was a very budget-friendly space in our home. And because someone is probably bound to ask, I will share that the entry "table" is an old kitchen cabinet that I found in the garage when we moved into our house. I turned it on it's side, removed one door, and painted it white. Now it holds books, pictures boxes, and shoes {under the door} + the top portion serves as a tabletop. Also, the jute rug was $10 at Ross. I love a neutral rug, and jute holds up well in an entry way with all of the traffic coming through.

I hope these quick updates/DIY projects provide you with some inspiration. Do you have any quick tips for me that you've found especially helpful in your entryway? If so, comment and share with me! I'm always looking for new ideas. Thanks for all of the love y'all. XO!


Monday, March 7, 2016

My Monday Round-Up # 3


Happy Monday, friends. Well, maybe that's not all that happy, but hey, you're alive so that's something to smile about. Being that it's Monday implies that yesterday was Sunday, which means that I have another round-up of my week for you. This past week included some new "footage" of our home; places that you guys haven't seen a whole lot. I spent a lot of time unwinding and relaxing in our bedroom this week. Really, I binge watched the entire season of Fuller house after Emerson went to bed. It was glorious. Anyway, I've got a pretty quick breakdown for you today since I shared the bathroom before and after earlier this week, which was one big DIY project. 
 This week I featured my dresser. It used to look like the picture on the right down below, prior to it's run in with some white chalk paint + new knobs. It now looks like the picture on the left! What a difference and for only about twenty bucks.


I shared our bathroom shelf, which was a $3 thrifted find. I didn't even have to repaint it. The wire basket on top was one of those dance-in-the-aisle $3 Target dollar spot finds. It's pretty self explanatory: the basket holds rolled hand towels, body lotion + a mason jar filled with Q-tips. The greenery that you see peeking in at the bottom is dried Eucalyptus from Trader Joes {a grocery store here}.

I also shared my "Mommin' Ain't Easy" graphic tee. I LOVE that thing. It is so comfy and it speaks the truth. You can get yourself one by visiting their web page or Facebook page. Support small businesses!

Finally, I shared an updated picture of our master bedroom. This room has been a serious work in progress. It changed a lot prior to this final product because I never had a clear vision for the space {and honestly I'm still not 100% sold on this, but I like pretty well for now}. Our room looked like the picture on the left when we first moved in almost 5 years ago. It now looks like the picture on the right.


There are several DIY projects in our bedroom. The "canvas" pictures over our nightstands, the headboard, the heart banner above our bed, the bench seat cushion at the foot of our bed, and our dresser/armoire/closet. I'll have to share the closet with you another time because that was a BIG project but it was SO worth it. Also, I get A LOT of questions about the chevron rug. It's a 7'x9' and I got it for $80 from Rugs USA during a holiday sale a few years ago! Totally recommend Rugs USA if you're in the market for area rugs; tons of options at GREAT prices! Most of the rugs in our home are from there.

Every week, I share one DIY project that you can easily do at home that's pictured in my round-up. I've chosen to share how to make the DIY heart banner that's above our bed for two reasons: 1) It's super easy + cheap and 2) I don't have pictures of the headboard process in order to adequately share that with you {that would've been my first choice to share with you though}. I can tell you that the headboard was made using a piece of plywood, a $10 painters canvas drop cloth from Lowes, foam + batting. On a scale of 1-10, with 10 being super hard, the headboard project was about a 3. If you're interested in hearing more on how I made it, shoot me a message or leave a comment, I'd be happy to chat about it.

So, the heart banner is a recent addition above our bed. The circle mirror {that's now above my dresser} used to live up here for a while, until I got tired of it/was afraid it would crush our heads if it fell. No one wants to sleep in fear. The space above the bed is a decent size, so it definitely needed something. I wanted to replace the mirror with something light and airy, nothing that appeared too heavy. I had zero inspiration or thoughts on what to do after I removed the mirror, so it stayed a blank wall for a little while.

I was pursuing the Target dollar spot, as I always do upon entering {c'mon YOU DO TOO}, and I ran across a p$1 pack of 12 gold heart foil-paper doilies {white on the back} and a $1 roll of twine. I immediately thought of a DIY banner. I didn't necessarily plan for it to go above our bed; I was actually considering it more for Emerson's room. However, once I got home and got it made, it just made sense to use it above our bed. 

So, how'd I make it? SUPER SIMPLE! Literally this is all that I did:

I pulled apart the 12 foil-paper doilies because they're all stuck together in the pack. I laid them out with the amount of spacing I wanted between them, and I turned them so that the white part was facing out {that's what I wanted to show, not the gold}. I strung them using the twine, then I tied loops on each end. I added tiny command hooks above the headboard on the wall {one for each end of the banner} and hung the loops on the command hooks. 

That's it. So easy, it hurts. It's nothing over the top or super fancy, but I really, really love it. It's simple, yet has a classic feel to it. I also love that it's hearts since we are married and are in looooooooove. Hearts = love, duh!


I hope you had a wonderful week and that this week turns out to be even better. Remember to keep an open mind if you're out shopping this week, especially in the dollar spot at Target. I'm literally there once a week; it's dangerous. There are some amazing little treasures in there just waiting to be DIY creations. 

Have you made anything awesome from a dollar spot find {or from anywhere else for that matter}? I'd love to see it! :)


Friday, March 4, 2016

Getting the Most Bang for your {100} Bucks: Cosmetic Bathroom Reno Tips + Tricks

This morning I posted this before and after picture of our main bathroom. Since posting I've received several inquiries about how I completed the transformation on a limited budget/without any major renovations. So I thought the easiest way to address everyone's questions would be a quick little post. So, here's the scoop on how I completed this cosmetic bathroom reno for under $100, with some easy tips + tricks.
We bought our house 5 years ago next month. That's crazy! The entire house was painted "Yellow Mushroom" by the previous owner who actually purchased the house as a flip property. While he made some major improvements to the home {the major bathroom reno being one of them}, he failed on the paint color, in my opinion. It was a weird yellowy-creamy-beigey color. It wasn't awful, but it definitely wasn't us. We lived with it for close to 2 years before finally biting the bullet and repainting. If you're interested in paint colors around our house, shoot me a message, otherwise I'm going to focus on just the bathroom today.

This was the bathroom with the original paint color + just some make shift accessories that I got super cheap at random places. {We had a lot of cheap stuff when we first moved in before my vision for our home really became clear}. These are the "BEFORE" pictures of me taping off the bathroom while in it's original state, to give you an idea of it's lack of appeal.


 We painted the bathroom "Breezy Blue" by Valspar. We actually ended up painting the kitchen and bath the same color as not to waste any paint. Tip 1: Before buying paint, determine if you can use it for more than one project. You want to get the most bang for your buck. Both rooms stayed this color until just last year actually. {The quality of these pictures is HORRID because they were originally taken on a crappy camera phone, so forgive me-just scroll quickly}.


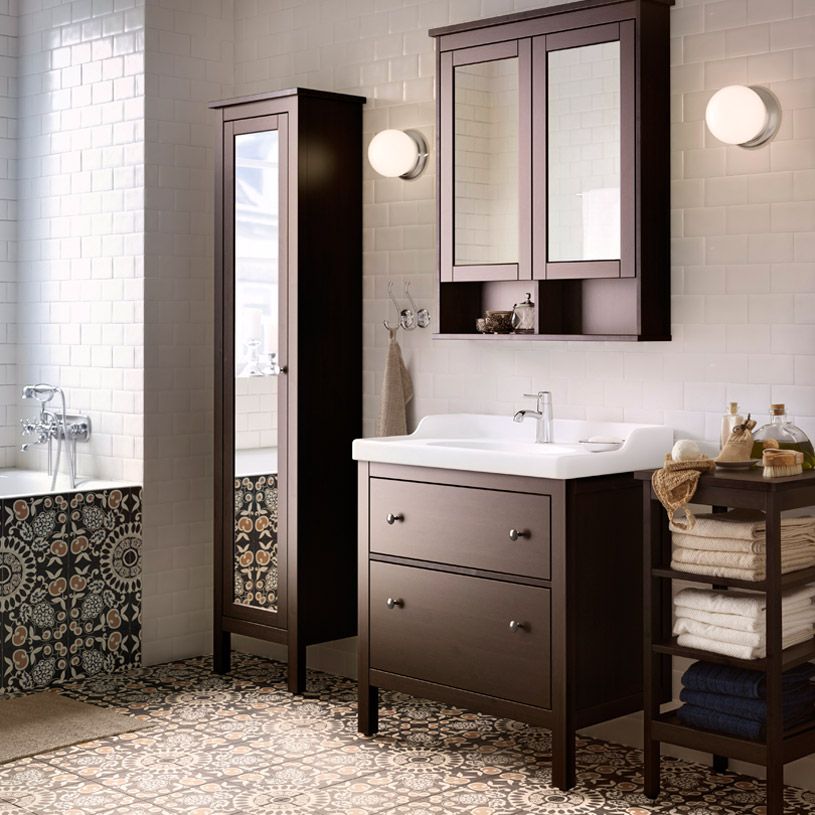
As mentioned, the major bathroom renovations were completed by the previous owner. He retiled the floor, added new fixtures, a new toilet, a new bath/shower combo, and a new vanity. Although the white vanity was in mint condition, I grew tired of it {and honestly, felt like it looked cheap}, so I started looking around. I found this IKEA vanity and instantly fell in love. I really liked the look of the dark cabinet on the bottom with the contrasting white countertop.


Unfortunately for us, it was out of our price range at the time. I was so bummed, but started brainstorming. Tip 2: Paint your vanity if you can't afford a new one. I was a little unsure if painting the vanity would work since it has a laminate or veneer finish {not sure}. I didn't care, I was up for the challenge. I bought a quart of paint in the color "Fired Earth" by Valspar. It's a dark, dark {almost black} paint, and I went to town. It took 3 coats. I don't have a picture of the painted vanity in the blue bathroom, but I do have an updated picture of it as it is in the bathroom today. 


Painting the vanity DRASTICALLY changed this bathroom and for under $20. Now, that is a STEAL! The vanity now matches the oil rubbed bronze mirror/medicine cabinet, making it appear much more stylish + upscale. The other big change was the paint color on the walls. Tip 3: If you want to change the entire feel of a room for cheap, paint the walls. I painted it {again} the same color as the kitchen, Gettysburg Grey by Benjamin Moore {color matched at Lowes using Valspar paint}. It's got a green tint to it, but a classic green, not a putrid green.


Another easy update to this bathroom was the shower curtain. Tip 4: Purchase a 9x12' canvas drop cloth from Lowes for $10 {sold at most home improvement stores + Walmart} + turn it into a curtain. Because canvas drop cloths come pre-hemmed, all I had to do was add the hooks at the top to turn it into a shower curtain. no sewing required. For mine, I folded over the top quarter of the drop cloth to create an overlap at the top. I then added {after this picture was taken} 12 drapery clip rings that just clip to the top portion of the shower curtain {no-sew solution}. It literally took me 10 minutes to complete this shower curtain. It's also great because you can throw it in the wash. I took to Pinterest and actually found how to "bleach" the drop cloth to make it softer and less brown/drop-cloth looking. Basically, it softens the fibers and makes it appear lighter than it was to begin with. {I used this same method for the "drapes" in my living and dining rooms. For those rooms, I took 2 drop cloths + cut them in half, hemmed them using no-sew tap, then hung them with drapery clip rings}. 

Tip 5: To make your bathroom appear larger, hang your shower curtain close to the ceiling. That's another reason I love the size of the drop cloth, I had plenty of "fabric" to create an extra long shower curtain. I used this little trick in both of our bathrooms + with all of the curtains in our home for that matter. It's super easy + really makes a big difference. You should try it! :)

Other minor cosmetic updates to this space include {see pictures below}:
* A $7 Jute rug from Ross Dress for Less
 * $4 hand towels from TJ Maxx
* A $12 bamboo blind from Big Lots {a discount store here}
* A thrifted white wall shelf {above the toilet} that holds a Target $3 wire basket which holds Q-tips {in a thrifted mason jar} + the remaining hand towels.
* A $5 glass jar candle, dried Eucalyptus in a thrifted glass vase, and a free printable "In the morning when I wake, give me Jesus" in a Dollar Store black frame.
* A white $10 sunburst wall clock from Big Lots hangs on the wall across from the vanity
* A thrifted ampersand back-of-the-door towel hook
* A thrifted basket used as a trash can {it matches the bamboo blind perfectly!}
** We also got interior doors in our main hallway, so the bathroom door is different too.**


And again, just to see the entire cosmetic transformation for under $100 start to finish:


If you try any of these simple tips or tricks, be sure to share a picture with me! I love seeing before and afters, especially when they're completed in a budget-friendly manner. XO!


Thursday, March 3, 2016

Mommin' Ain't Easy

In my 28 years on this earth, never have I learned more about myself than in the past 18 months. My daughter, Emerson just turned 18 months old {young} recently, and it has made me reflect on my time as a mom thus far. If you've followed me for any decent amount of time, you probably are familiar with the concept that mommy-dom was not {and still sometimes isn't} my thing. Motherhood has never been "easy" for me. Some moms just love every moment of motherhood and all that it encompasses. For me though, I still have days where motherhood just isn't all I thought it would be. I still have a hard time wrapping my brain around the fact that Emerson will be my daughter and require my supervision {in one way or another} for the rest of her life.

You know that song that says "Hello Mr. Brightside"? Yeah, that's not me. See, I can readily admit that I don't always look on the bright side, or find the joy in certain moments. I'm not even sure I'm a glass half-full type of person, as I like to pretend that I am. I like to try to be positive, but I'd be lying if I said that I am a "positive person" all the time. Some folks just have a sunny disposition, and while I do think that I have a sunny personality, I don't always know how to tap into it, especially when the going gets tough.

Motherhood for me has been joy and pain, tears and laughter, anxiety and peace. It's been days or months of  immense weakness followed by weeks of great strength. I can't explain it, but motherhood has changed me, as I'm sure it's changed you as well. I have learned more about myself in the past 18 months through the mere fact that "mommin' ain't easy", but it's life changing. Maybe you can identify with some of my most life-changing revelations over the past 18 months.

1. Before Emerson I lived life for ME. After Emerson, my needs came second to hers and suddenly "ME" wasn't so important, or so I thought. I have learned over the past 18 months that while she, of course, is my priority, I must put myself first. If mama ain't happy, ain't nobody happy. As cliché as it is, I very much mean it. For a long time, I did not put my needs and wants as a priority and my mental + physical health suffered because of it. I did not take care of myself, and I did not take time to be ME, Chelsea, the one that existed before Emerson. Now that I've learned the importance of that, I know what a difference it can make long-term. Mama's, if you hear nothing else I say today, hear this: Take care of YOU! Even if that means a 5 minute shower in the middle of the day or a Coke Zero at the grocery store just because you feel like having one. If it is going to make you feel like a better mama + woman, do it. You deserve it one thousand times over. I deprived myself of personal happiness for far too long and it was my greatest mistake thus far in this motherhood journey {through I'm sure something will come along to top it eventually}.

2. Before Emerson I did not need much help from other people, aside from the Lord. I was {and still very much am} a very self-sufficient woman. I am confident and I am not easily swayed. I stand firm in my beliefs and I don't need others to feel secure with myself. After Emerson, I continued to not ask for help, and you know where that got me? Overwhelmed and exhausted. It made me question my every move, especially related to child-rearing. I googled WAY to much and I didn't trust myself anymore. So, another very valuable lesson that I have finally started to learn just recently is that {as wonderful as they are} parenting books, the internet, Siri, my mom or even husband, NO ONE can tell me how I have to mother. That is an innate part of me that God created + He knew what he was doing.  I AM her mother and the Lord has equipped me with everything I need to care for her. I have learned that He will not give me anything more than I can handle, even when it feels like I'm at my breaking point.

3. Before Emerson, I never really felt the need to compare myself to other people. Sure, I dealt with typical female insecurities from time to time, but overall I wouldn't say that was a major struggle for me. After Emerson, not only did I compare myself to others physically, but I compared my mothering to others. After having Emerson, I was very quick to judge other moms based on their parenting style.  Yikes, that's kind of hard to admit to you guys. I would never outwardly judge someone, but in my heart I knew it was happening. After Emerson, I compared my lifestyle to other people's lifestyles. I compared my husband to other husbands with kids. I compared my baby to other babies. I pretty much was playing the comparison game like it was my job. I have learned, mostly just recently, that comparison truly is the thief of joy. It comes to steal and devour, and oh, how it has done that to me numerous times. I honestly believe that it deprived me of some of the most precious moments in my adult life. I have been preaching to myself daily the importance of contentment and gratitude for what we have and how great we have it. Sure, I struggle with all kinds of things, but in reality, most of those are so trivial when looking at the big picture. I strive now to check myself when I find my mind wandering to all of the "if only's". I quite literally have to check myself before I wreck myself when it comes to this.

Before Emerson I took for granted the time that we're given in this life, thinking that my time here is infinite. Except, it's not. After Emerson, every day, no matter how terrific, or mundane or frustrating is a gift from God. I, my friends, am a gigantic work in progress and I believe I have Emerson to thank for that. Because of her life, I am learning to appreciate the days when nothing goes right. I am learning to laugh when things don't happen as planned. {As a control freak, that last one is VERY hard for me}. I am learning to appreciate my journey in motherhood instead of comparing it to everyone else's. It's so easy to compare, like I mentioned above, but I am learning to trust that mama knows best, and heck, sometimes daddy might know a thing or two as well. I am learning that in order to be a good mother, I also need to be a good wife. I am learning that even when I dislike my role of "mom" for a moment, it is the greatest blessing I've ever received. God chose me to be her mom and I will never be able to thank him enough for using her life to forever change mine. He never said mommin' would be easy, but He did promise it would be worth it.


Can you relate? XO!