Friday, February 5, 2016

Watch and See

As I sit here staring at my computer screen, my fingers literally can't keep up with the speed at which my brain is moving. I have SO much to tell you guys, but so little arm strength currently. Why? Well, I worked out my arms + shoulders today...H A R D, and I'm incredibly sore already. Tomorrow isn't looking promising. Additionally, I told my husband that I'm officially becoming a "gym rat" {ha ha ha ha, I literally can't say or read that without laughing hysterically} because I have callouses on BOTH of my hands from lifting weights! I never thought I'd see the day. Okay, enough gym talk though because honestly I'm NOT a gym rat by any means AT ALL, and that's not why I'm writing today.

So you want to know what's racking my brain? This blog. My Instagram. Giveaways. Blog collaborations. DIY projects. Business opportunities within each of those things. You guys! God is doing big things right now for my creative side. He is opening doors that I didn't even know existed. 

Let me back up and explain how all of this came to be.

Most of you know that prior to Emerson's arrival on the scene, I was a 3rd grade public school teacher. I loved it, but there were many signs it was time for me to go a different route, and it just so happened that I got pregnant and that was the ULTIMATE sign. After having Emerson at the end of the summer 2014, I lost myself. I went into a deep spiral of emotion and negativity that I was unfamiliar with up until that point. As a fresh mama dealing with some serious postpartum depression, I was desperate for an outlet. I wasn't asking God for help, certainly not as much as I should've been, but God literally threw an "outlet" {in the form of a job opportunity} in my lap. It could not have come at a better time, honestly. I had Emerson in August 2014 and started this job in November 2014. I worked for a non-profit organization for a little over a year as a site coordinator and lead tutor in an elementary school. It was right up my alley, until I suddenly lost my passion for it. I can't really explain what flipped the switch, but I just knew that I wasn't the person for the job anymore. I made a rather rash decision to quit early last month before the spring semester really kicked off with the public schools, and after much discussion and prayer, I decided leaving the position was the right thing to do. My boss was very understanding and I felt at peace about it. 

>> Fast forward about a week >> 

With all this new found "extra" time, I began doing some more DIY/decor stuff around the house. I also started blogging a bit more {mind you, I still have a toddler with me all day, so most of this happens during her nap or after she goes to bed at night}. It ignited a fire in me that's been missing for a long time. I started getting major responses to my blog all of a sudden, and the recent projects that I've posted to IG were {SOMEHOW} gaining popularity/views, so I decided to research how I could gain more of a following to perhaps turn this passion for writing and decorating into a "job" of sorts. I read articles and blog posts and statistics about building your blog, how to write a good "about me" page to draw people in, what hashtags to use to bring in likeminded people, and how to capture an audience. Though, my focus wasn't really on what to write about, so much as it was how to get it out there to those people that would enjoy it's content. I contacted other bloggers, other moms {both friends + complete strangers on social media}, and I began asking questions about how they got started and how they continue to build their community of followers.

I stepped outside of my comfort zone on SO many levels. Sure, I love to talk, but I'm not one to ask strangers for their opinion. But, one of my goals for this year {ironically} has been to say "YES" more to things or situations that would normally make me uncomfortable. One of those has been to consistently exercise, and another has been to expand this blog {by means of my Instagram account mostly}. I'm a pretty private person, outside of this blog, but for some reason this blog is SUCH an outlet for me. It allows me to encourage others {hopefully}, while also build relationships and share my heart. I have built a following here and on Instagram, especially over the past month, and it just brings joy to my heart to know that people care enough about what I'm saying/showing them to keep coming back time and time again.

All that being said, within the past week alone, you've probably noticed that I've been very active on Instagram with posting my house projects and whatnot. This is due partly to the fact that I'm proud of them + how they turned out {and I hope to inspire others to do things to their homes that make them love being there}, but also because I love sharing in the community that enjoys projects and mommy-dom as much as I do. I say this next part not to brag or put myself on a pedestal, so please don't misread this, but I have gained 100 followers in one week! You guys, that's crazy to me!! Maybe it's not a big deal to most, but to me, it's a r e a l l y big deal. This week alone, I have been asked to host a giveaway {which helps to get your name out there to others in the community who love the things that you love}, to be featured on 2 other blogs by bloggers MUCH more popular than myself, AND I've received the most loving and encouraging comments on things that I've done, made, or written. I've been asked by 2 different people to create things for them based on something I created for our home. From the bottom of my heart, I am so grateful. Words of encouragement is definitely a love language of mine, so your words mean MORE THAN YOU KNOW. 

I am convinced that God is opening doors for me through this blog and through my Instagram account. I don't know if it will turn into a business venture or remain strictly a hobby, but one thing I do know for sure {and I realize that it sounds slightly ridiculous to say this} is that my "platform" {for lack of a better term} here with this blog + on my IG account, is confirming in my heart that God knows me far better than I know myself. And that His plans are greater than mine.  I believe that He knows my heart and my deepest desires. He knows how much I long to create and inspire others through doing what I love, writing and DIY'ing. I know that He has closed several doors in the past to open one that's far greater. I don't know what the future holds for me in regards to all that I've mentioned here today, but I'm so hopeful and excited to see how God uses me and this platform to further His work and His name. I know he'll keep me humble through it too. He's good at that!

Ps. In case you missed it and/or you don't follow me on Instagram {I forgive you, but seriously, go now}, here's a a DIY that I did yesterday for our mudroom. I posted about how I was planning to hang a sign over our mudroom door. It's a super quick DIY wooden sign that I created freehand using a ruler + a black SHARPIE. :) I love how it turned out, especially for it being my first one {the "O" was a little bigger than I'd planned, but OH well. ha!!}. I surprised myself with this one, honestly.


Thank you again for all of the love and all of the encouragement as I continue this journey, that's still somewhat unfamiliar territory to me. I am eagerly learning and waiting for what God is going to do. If you're a faithful follower and/or you've ever sent me love in the form of a text, email, call, message, comment, or any other form, T H A N K Y O U! You will never know how much I appreciate it. Stay with me and let's see where He takes it...


Wednesday, February 3, 2016

Mudroom Makeover on a Budget

As promised,  I am updating you guys on a last minute makeover project that was totally SPUR OF THE MOMENT thing. It's been a heck of a day, so this is late making it's way out, but it's here nevertheless, so that's all that matters! In case you missed it {and/or don't follow me on Instagram, which YOU SHOULD}, it's a mudroom makeover on an itsy, bitsy, teeny, weeny  yellow polka dot bikini budget.

I haven't quite finished the makeover yet, but thought it'd be fun to update you on the progress thus far. Have you guys heard of the new decor fad "ship lap"? It's basically like wood planking your walls, except with white boards {at least, that's what I've been led to believe}. Well, my original plan was to ship lap one of the walls in the mudroom, except not the real way...the fake way. The fake way being black sharpie. No really, I've seen a couple tutorials online about doing a faux ship lap wall using white paint, a yardstick, and a black sharpie. I think I've since nixed that idea because our walls are so textured that I'm not sure I'd be able to adequately draw the lines on the wall without them looking like I did it while intoxicated. It's not completely out of the question, but for now, I'm putting it on the back burner.

To begin the makeover, I painted this little room Benjamin Moore's White Dove to cover the existing color, Valspar's Morning Zen {a minty pale green}. That instantly brightened the space and provided a truly blank canvas. I haven't hopped aboard the all white err'ythang train yet, but it's growing on me for sure. To continue, I removed the existing curtain that covers the hot water heater + other unsightly tanks and replaced it with this random piece of fabric that I found at CHKD Thrift for $2.99. It's a very thin black and white gingham, borderline checkers, but I dig it. I knew I wanted the room to be mostly black and white, with some greenery and gold touches thrown in for pizazz.


Fast forward a couple days and I was able to take a solo trip to Goodwill to search for my trash to treasure items. I was searching mostly for a shelf, a vase {of sorts}, and any items that could work as wall decor. I may or may not have gotten sidetracked at the clothing section, but I  digress {also, don't knock it 'til you try it-75% of my wardrobe is thrifted-no shame in my game}. Here's what I found for the mudroom:
                  
The rectangular thing shown beside the oversized clothespin below was an ugly {beat-up} wooden wall plaque that had a picture of a blue dressed up dog on it. It was a REALLLL beauty, y'all. I got it for $1, painted it and modge podged a printable quote to it that says "Find a happy little something in every day", and I added it to our hallway gallery wall. It just didn't quite fit the mudroom wall like I was hoping. Oh, well no harm done.


The gold "vase" appears to be an antique old matches holder. It even has the striker on the side. The shelf was a twofer {2 identical little shelves for $3.75}. The oversized clothespin was just a light brown wood originally that I painted black; it was $1. AND MY FAVE PURCHASE, the gold lantern! It was a whopping $2 and I didn't have to do a thing to it because it was already gorgeous. Everything else pictured in the final gallery wall below were items I already owned. I tend to "shop" in my own house for items before I go buy anything. The only thing that was "new" to me {gifted} was the print, which says "Believe the best, Forgive the rest, and say I Love You".

After playing around for a bit, here's the final product {for now}. I have a project in the works for above the door. It involves a piece of wood + some paint. Okay, twist my arm. It's going to be a sign that says "Our Nest". I'll post pictures to Instagram once it's complete. The last two things I really need to do, excluding the sign, are find a flat rug that doesn't catch on the door + work on drawing on my DIY chalkboard covered wall electrical panel.


 The "L" was white, but I painted colored it with a gold sharpie. The little ceramic "I love you" heart was a $1 Michael's find like 6 years ago. Oh, and the framed picture of the couple kissing in the car {which was teal, you just can't tell}, that's us on our wedding day. :)


Thanks for checking in and again, my apologies for the later than anticipated post. You can thank my sweet girl for that. Apparently, a 20 minute car nap was sufficient for today. OH, and I locked my keys in my car while I was NOT at home. Sooooo, yeah I've been a little preoccupied today. First time for everything, I suppose. Speaking of, I just ripped my favorite pajama pants. This day calls for frozen yogurt. DO OVER PLEASE!

Thanks for reading you guys and be sure to check out my Instagram {linked on the right sidebar of the homepage} for updates and pictures of my girl. XO!


Sunday, January 31, 2016

I Like Big Prints + I Cannot Lie

I hope all of you have had as gorgeous of a Sunday as we've had here in the SouthEast! It's been a major mood booster, in addition to the fact that we got a BRAND NEW VACUUM! We went and jumped off the deep end...You know I feel just like a kid again. {If you can name that song, you win bonus points}.  No, but truly, this new vacuum has me all giggly and it has definitely gotten all the heart eyes {Dyson cordless for the record}! That's not why I'm posting, I'm just THAT excited about it. Y'all know I love a good clean, so this little intro should come as no surprise to you.

Now onto the real reason for this post! 

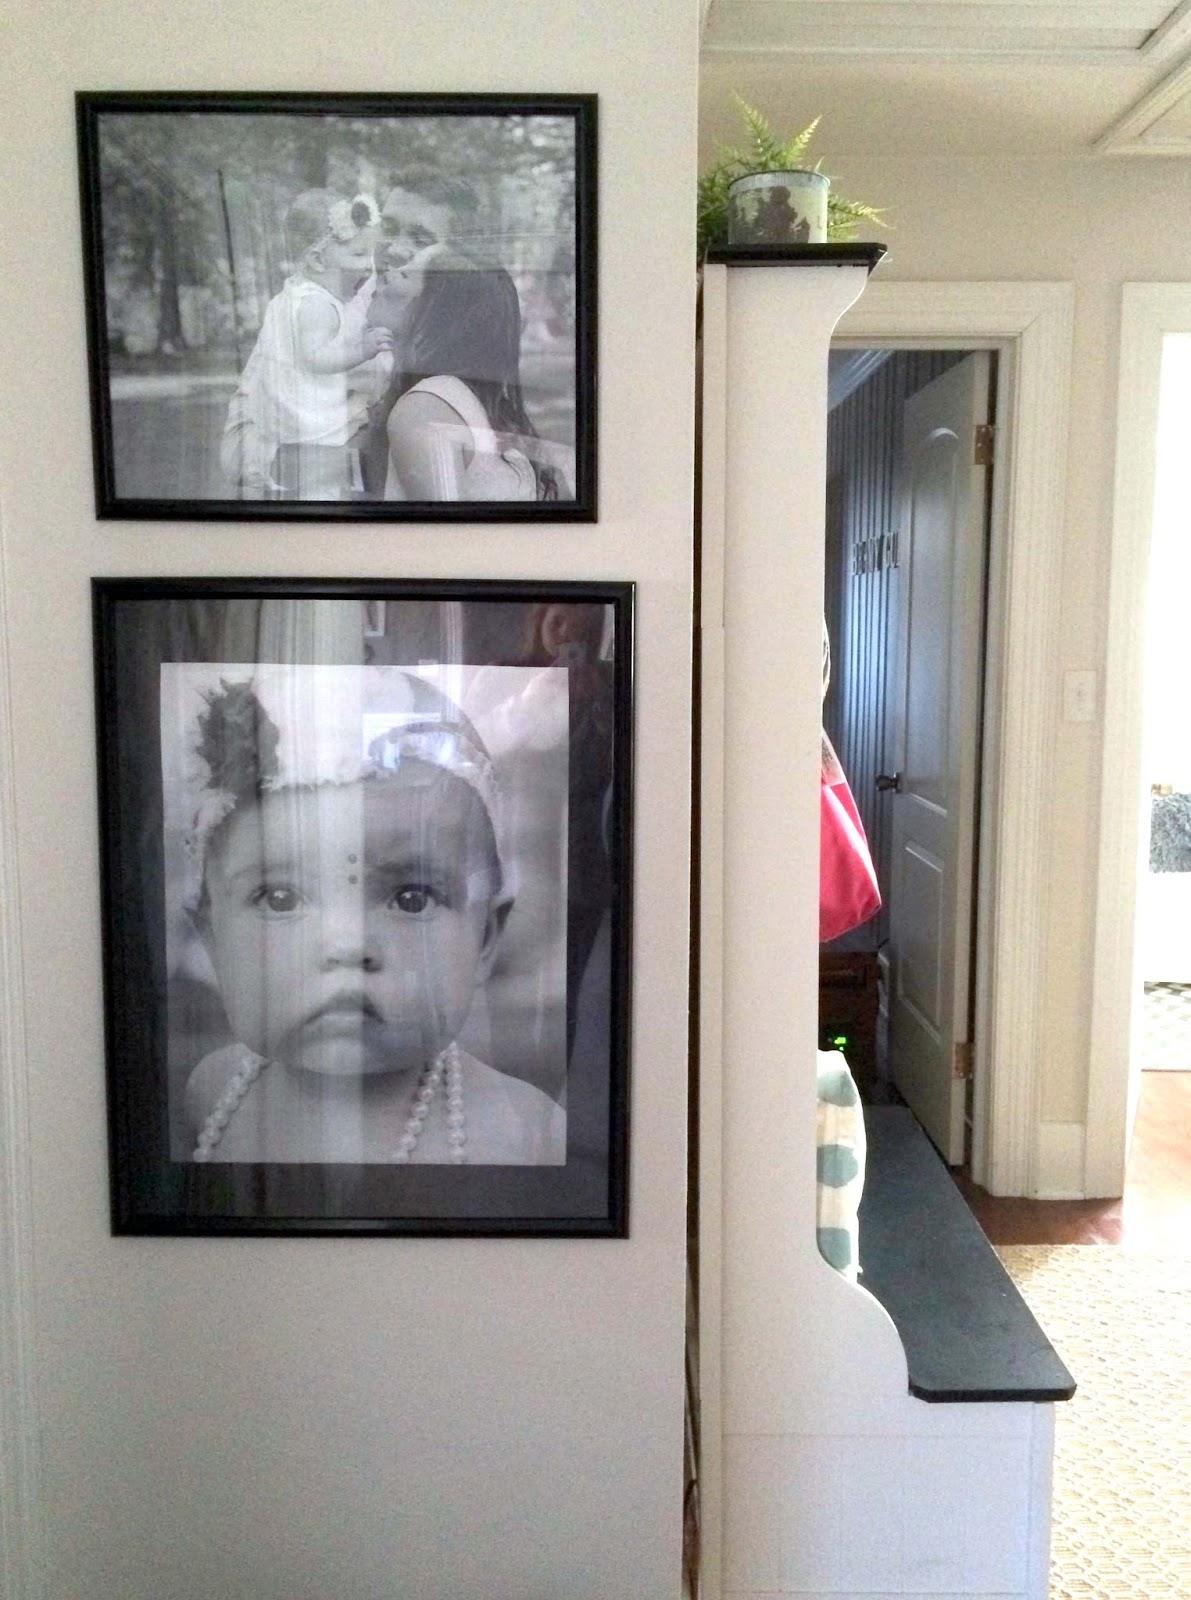
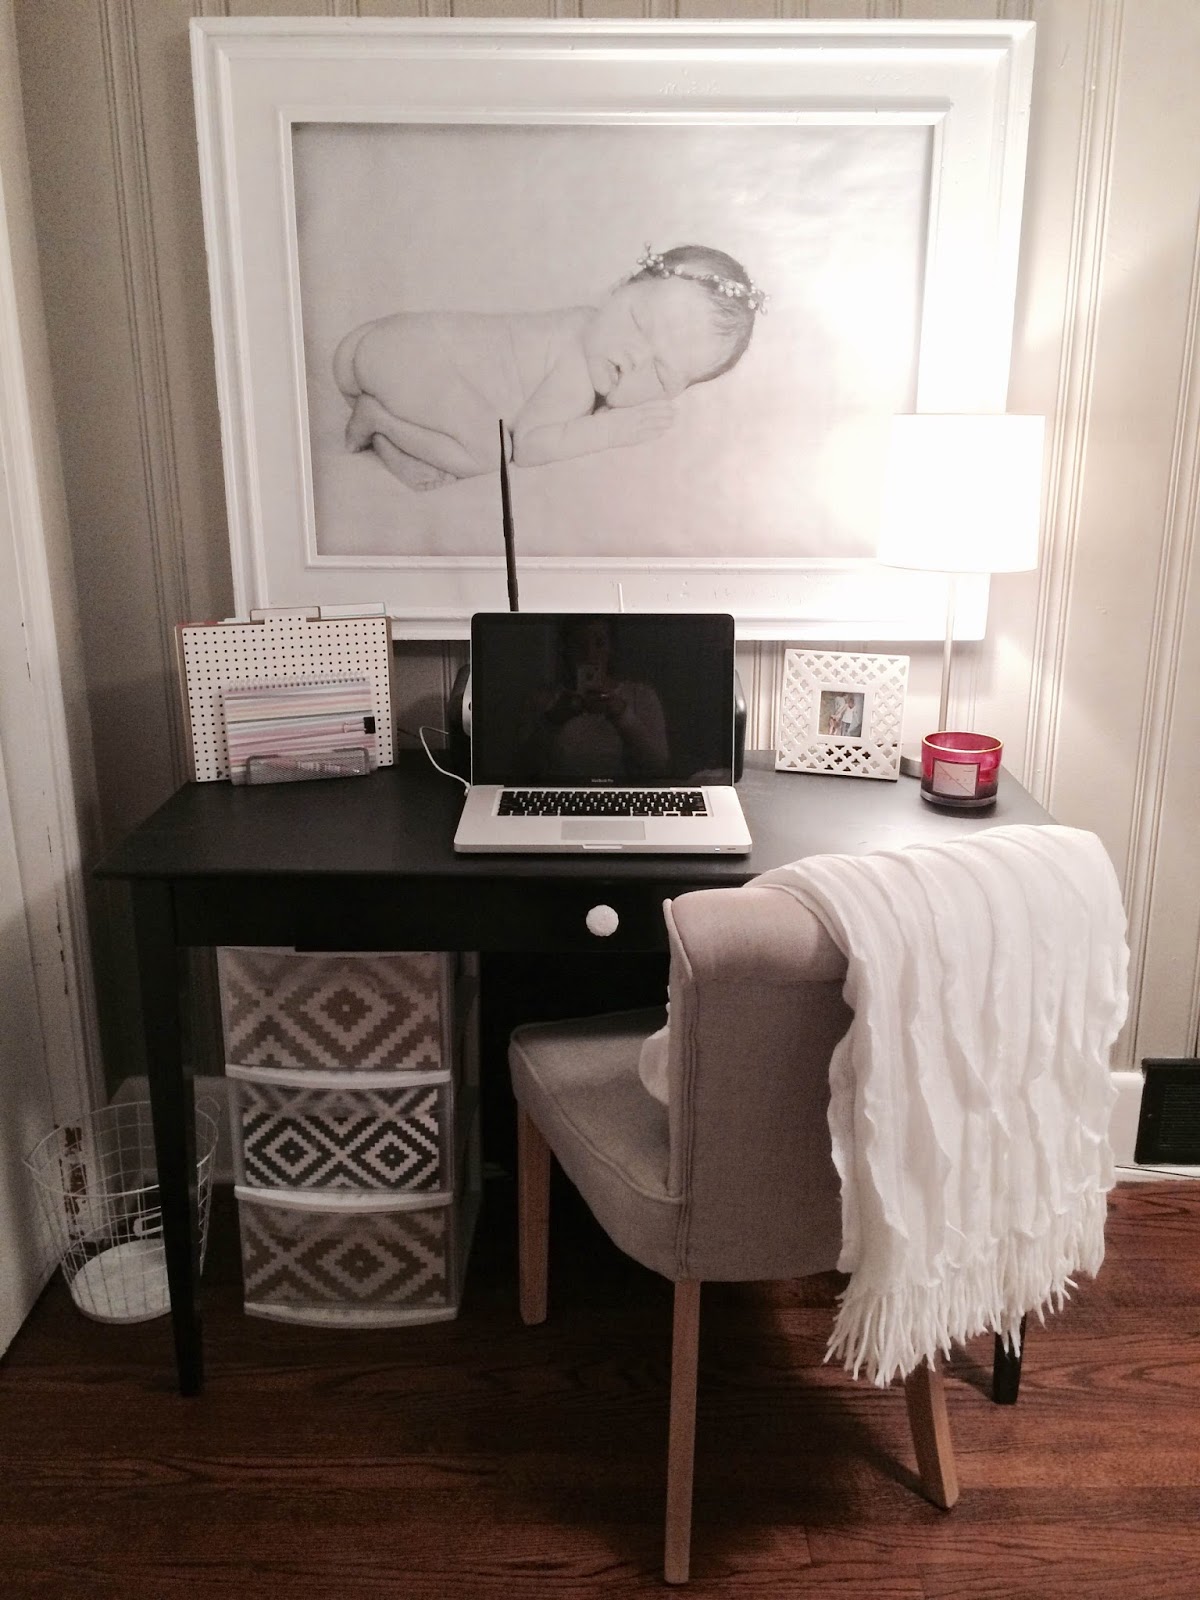
Since posting the guest room/office makeover , I've gotten several questions about the enlarged print over the desk. I have shared before about all of our oversized B+W prints. I am sliiiiightly obsessed. The process is really SO easy and extraordinarily affordable! I'll show you examples of the prints in our home, then I'll explain how you can get them for yourself for SUPER cheap in one afternoon!!

These next few hang in our master bedroom {one of each side of the bed + the window on the gallery wall}. I plan to modge podge {which just autocorrected to "dodge lodge"-ha!} these to the canvas that they are currently glued to {only on the corners}. I didn't want to do anything permanent until I had them hanging for a few days to be sure I liked their location, which I have decided that I do. I'm very noncommittal and my husband has kindly requested that I not add anymore nail holes to our already holy walls. :)


The print of my husband + Em came out a lot darker than the one of me + her, which kind of bugs me, but it's okay. I'll deal...eventually.


 I got two old window frames for $10 each from a friend who lives out of state. Her neighbor sells them + she snagged me two. All I can say is, it's a good thing her neighbor is not my neighbor because all the windows would be officially sold, more than likely. I love these things! The one below hangs in our master bedroom as well. The other, which will be seen if you continue reading, hangs in our living room.


{Close up of the one above}

 This next one is actually just stapled to an actual 18 x 24" canvas {that I happened to find at Goodwill for $1}. You would never know it is just a thin piece of paper attached to the canvas via staples on the back. HA, trickery at it's finest. {This was a photo from our newborn shoot-so LONG ago! *cue crocodile tears* }


 The glare on these next couple was completely unavoidable thanks to the light that shines from the front door. I tried to eliminate it best I could, but I could not for the life of me get a decent picture, so, I'm sorry about the reflections and the graininess. Hopefully, you get the idea. {And yes, that's our model baby at her first birthday shoot. We've been told she resembles the Gerber baby, and no, she's not actually a model, we just call her that because to us she's the most beautiful girl in the world.}

Okay, so now you want to know how I got these huge portraits each for $5 or less {not including frames} in just five easy steps? 

O N E, determine the size you would like for your prints. If you plan to adhere them to canvas, you will want to add an inch or two to account for the sides. Also, the prints will be printed with a small white border around the edges. Also, be sure to measure them based on whether you are going to want them printed landscape or portrait.

T W O, contact the nearest Office Max/Depot {or Staples} store + ask to speak to the print services department. Tell them you would like to send in some pictures with dimensions via e-mail to be printed as engineer {or architectural} size prints. Ask them for the e-mail address in which to send your pictures. Then, thank them kindly. *You can also ask approximately how much the total cost will be, but normally in my experience {depending on the size} they're ~ $2-4 per print* I have never printed larger than 24 x 36", so if you need larger, you'll want to ask how large they can print them.

T H R E E, determine which pictures you want to use, then write an e-mail similar to this one. {Yes, this is part of a real e-mail that I sent to print services. I deleted personal information for privacy}.

{Included in the email was the following: the size of the prints desired: 18x24 for example, the phone number at which I could be reached, and the time + day that I would be picking them up}. 
**IF THEY ARE PROFESSIONAL PICTURES, BE SURE TO ATTACH THE PRINT RELEASE or they will NOT print your pictures**

F O U R, pick up your prints + inspect them to be sure they were printed correctly {portrait vs. landscape, etc}. Be sure to be specific about all of the dimensions + print style in your email {see step 2}

F I V E, frame or attach to canvas {or wood}. If you need tutorials on how to do that, there are lots on Pinterest that are better than what I could provide. Hang said frame or canvas, then step back and admire your insanely cheap oversized prints! :)

For the record, I have never paid more than $7 total at any time and that was for TWO 24 x 36" prints. The larger the prints the higher the cost, but really, it's still SO cheap compared to what you'll pay if you go through a photo printing company. They will ONLY print these in B+W, so if you want color, you're out of luck as far as I know. B + W is so classic though, so you can't go wrong! If you use this and it works out, please come back and let me know or post a picture to Instagram + tag me {littlethriftychic}. 

Thanks for reading! Now, go get to it! XO!


Friday, January 29, 2016

Before and Afters {from 2011 to now}


My style has evolved quite a bit since we moved into our house 5 years ago. When we originally moved in, we were coming from a one bedroom apartment to a 3 bedroom house. There was a lot more space than we were accustomed to, which meant more spaces to fill and ultimately  decorate. I have always loved interior decorating, but you would never really know if you looked at our house from 2011-2013 because it was filled with hand-me-down and super mismatched furniture. It has taken me F I V E years to get our house to a place where I'm pretty content with it. I'm such a homebody, as you guys know from previous posts, that the space around me plays such an impact in my life, that I need it to be a place I enjoy aesthetically. It's not everybody's thing, but it's my thing, so there.

Also, let me throw this out there while we're at it. If you follow me on Instagram, you probably noticed that I have been posting far more pictures of our home {and less of Emerson}, and even posting multiple times daily. {If that annoys you, please feel free to unfollow me. It won't hurt my feelings}. I've done so because I have started following more home decor/DIY/mama bloggers on IG and they often ask their followers to participate in a variety of hashtags and "games" if you will. It's fun for me and a cool way for me to interact with other bloggers/DIY obsessed women that I wouldn't  interact with otherwise. One of the hashtag challenges was to post a "before and after" of something/somewhere in your house. I posted this photo:
The top is the "before" of our back room. It gets great light, but before it had dark red brick on two full walls {which made the room appear SO dark despite the large windows}, brown carpet and a black wood stove. The bottom picture is the "after" of the same room. I whitewashed the brick walls, added a light gray + white area rug ON TOP of the carpet {wasn't sure I'd like it, but I actually really do...like a lot}. I added different window coverings, and slowly brought in "new" {aka Craigslisted} furniture to fill the space. The wood stove is still in there, it's just disguised with black bookcases and a television. For more pictures and updates on this space, click on over to my most recent post that tours our playroom. This is definitely one of the most dramatic changes in our house, in my opinion, if not simply for the bright and cheeriness of it compared to the previous gloom and doom. 

In keeping with the before and after spirit of today, I thought it would be fun to share several before and afters from our home. Everywhere from the living + dining room, to the bathroom, to each bedroom. I think it's safe to say that every single room has gone through some pretty decent changes within the past 5 years. Shoot, paint alone changes a room completely. Can I get an amen?

Before and after pictures 
{I think you'll be able to tell which is the before and which is the after, so I will not commentate too much}.

Let me preface these by saying, EVERY SINGLE ROOM in our house has been painted since we moved in. The entire {yes, even the closets!!} house was painted a color with the title "mushroom" in it. So, if that isn't a hint that you should repaint, I don't know what is. It was like a yellowy-beigey-cream color. It wasn't totally awful, but it wasn't us at all, and for some reason it looked SO yellow in all the rooms! Thank God paint is an easy fix! Since being painted, the living room, dining room, and front foyer are Benjamin Moore's Revere Pewter. The kitchen + main bath are BM Gettysburg grey (it's a greenish-grey}. The master + guest bedroom/office are BM Smoked Oyster. Emerson's nursery is a random grey color {can't remember the title}, which is also the same color as the 2 walls around the windows in the playroom. We have other rooms not shown here that have BM White Dove and Valspar Morning Zen {pale green}.

 First, a close up of the picture I showed above.


Guest room turned nursery for Emerson

                     
{I made that E on the wall for $8, ask me how, if you're interested}

This makes it in the TOP 3 favorites: the fireplace in the living room.


MY MOST FAVORITE before and after is definitely our dining room! It literally looks like a completely different space.
Too many dark colors! The room looks so tiny!

Below is a the only shot of the foyer from "before" that I could find in my hundreds of pictures {standing in living room}.

{from a different view, but same area}

 {that lime green console makes another appearance below-different shade of green though-I had a MAJOR thing for lime green when we first moved in...yikes!}


Living room shot of the couch + side table
{and blurry at that. These before pictures were taken before quality iPhone cameras}.

Where's Emerson? ;)

The Guest room/Office
{All paneling in here guys. MAJOR HAND CRAMPS thanks to all those crevices}. 


Master bedroom
 Don't have a full shot, sorry!
{DIY headboard + canvases}

Eat-in portion of the kitchen
The kitchen has been painted twice since 2011. 
First it was Valspar's "Breezy" {blue}, then it moved to BM Ghettysburg grey, just recently.

 Main bath
{this is not the very first "before" but it's the only one that I can find a picture of on the computer.}

{I literally just snapped this picture-no edits- below because I couldn't find a recent one-see the next picture for  a truer color}.
{I painted the existing cabinet a very dark brown-almost black instead of buying a new one}.


Well, there you have it, my favorite {and most of} the before and afters in our home. It's been a long, sweat-inducing {sometimes tear-inducing} process, but I absolutely LOVE our home now and it's hard to imagine ever leaving, though I know that time will come and I'll just have a new blank canvas to work with! What's five more years of my life, eh?

Hope you enjoyed and if you're stuck with hand-me-down furniture and mismatched items, don't worry, there's hope!! If I can do it, so can you! Just think outside the box and get creative. Also, be patient. Changes don't happen overnight, as hard as I may have tried to make them happen that way, trust me, they did not.

So, what does your style say about you? I like to think mine says calm, organized, and pretty comfortable in it's own skin, just like me. :) Hope this helps give you some style inspiration! XO!